Introduction
With the world cup in progress, I decided to create a map that shows winners of the previous tournaments. I browsed the internet for information and I settled with information I found onM https://en.wikipedia.org/wiki/FIFA_World_Cup. I learnt from this source that as of the 2026 World Cup, 23 final tournaments have been held since the event’s inception in 1930, and a total of 80 national teams have competed. The trophy has been won by eight national teams as follows:
- With five wins, Brazil is the only team to have played in every tournament,
- Germany with four titles,
- Four titles for Italy,
- Argentina, with three titles,
- Two titles for France,
- Uruguay with two titles,
- 1 title for England, and
- Spain also winning 1 title.
As Peter Greenaway said, “A map tells you where you’ve been, where you are, and where you’re going — in a sense it’s three tenses in one.” I decided to put this information on a map.
Let’s dive in!
Software choice
For the mapping tool, I settled for QGIS, the leading open-source desktop GIS. Unlike many Desktop GIS software, QGIS is free, yet rich with analytical and cartographic capabilities. You just need to download it from the QGIS website. It is cross-platform, available on Windows, Mac, Linux. For this project, I used the most recent QGIS version, QGIS 4.0.
Getting the data
Most of the time, the dataset is not always in a form ready for GIS. We need to prepare data so that we can use it to create maps. All I had was knowledge of winners and participants in text format. How was I going to bring this into GIS?
I had QGIS software installed already, so I launched the software. I closed the start pop-up window that shows up: 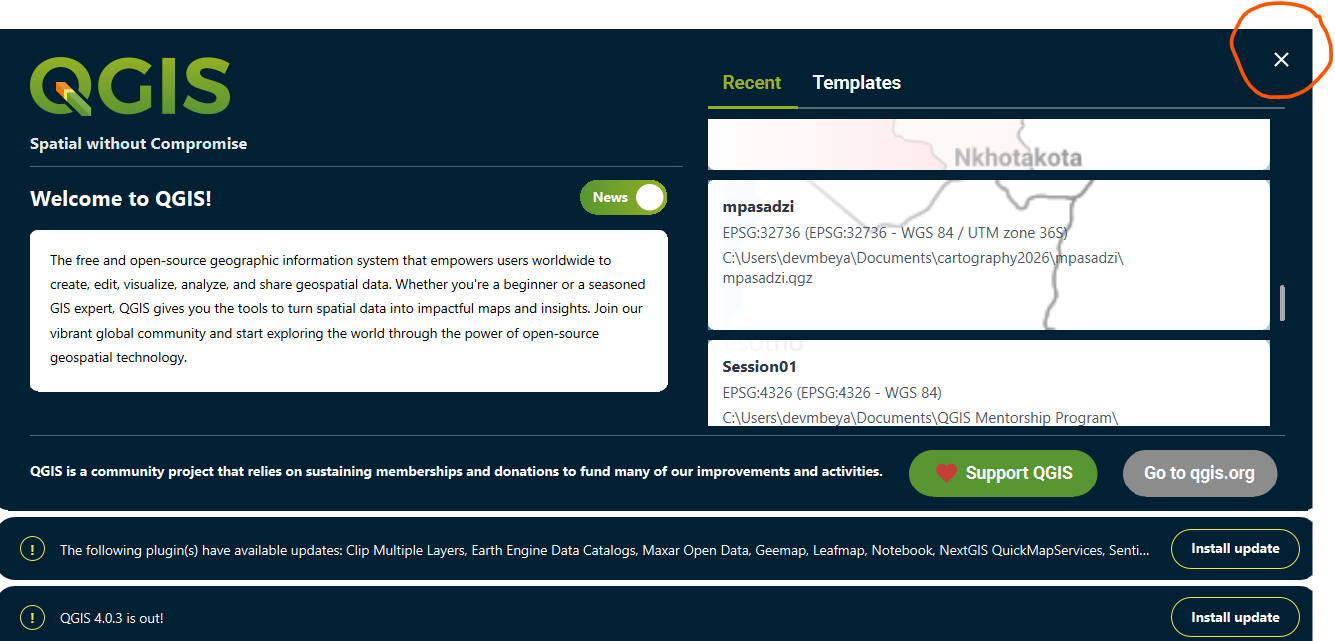
I realised I needed the world countries shapefile. I could download the shapefile from places like Natural Earth but I remembered that by default, QGIS includes a sample, basic world map dataset in its installation files. Entering the word “world” into the Coordinate box tells QGIS to fetch and display this file instantly.
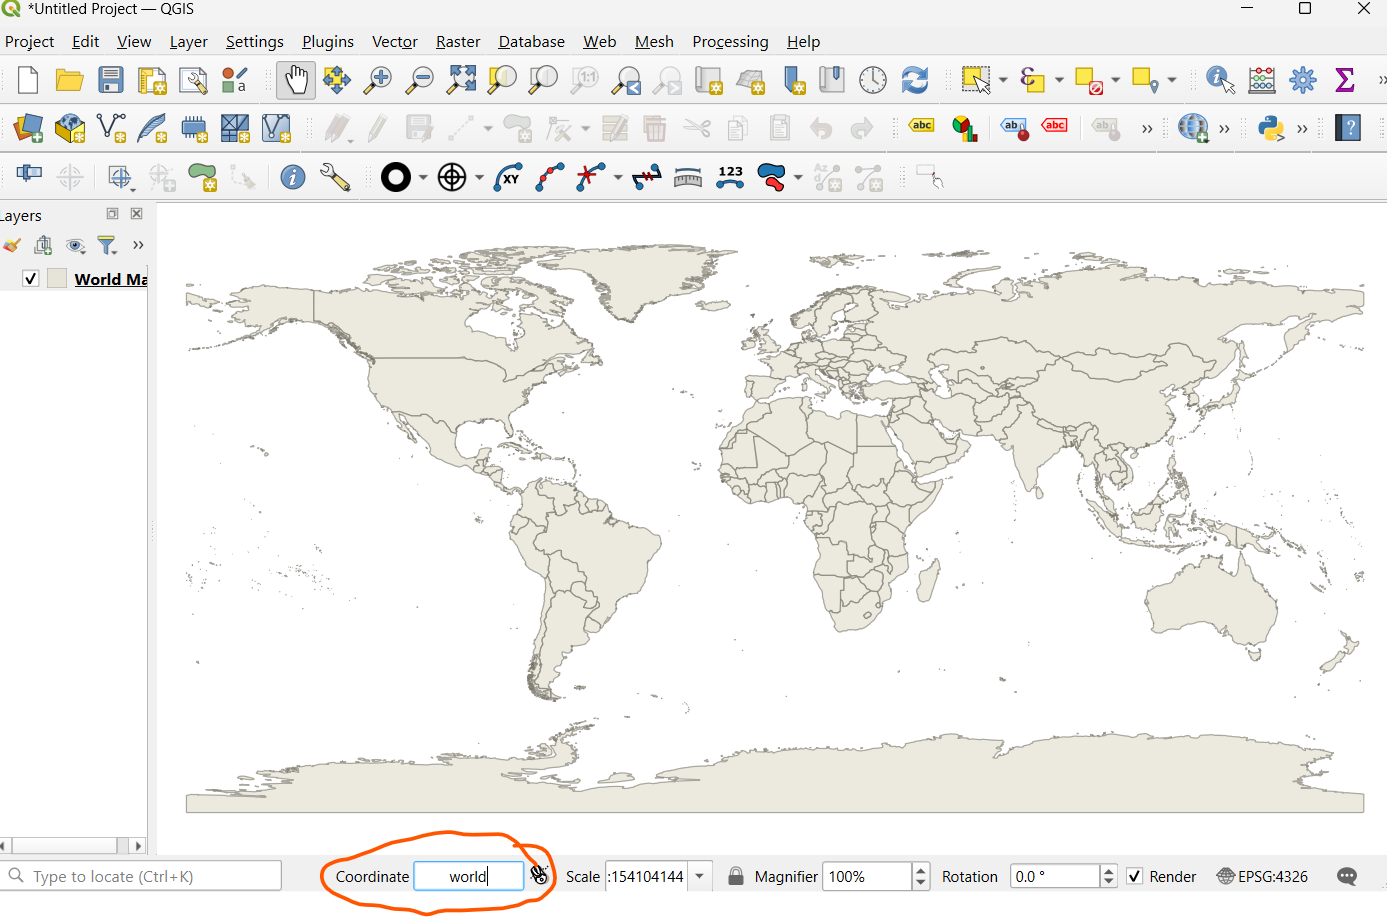
Explore the world shapefile
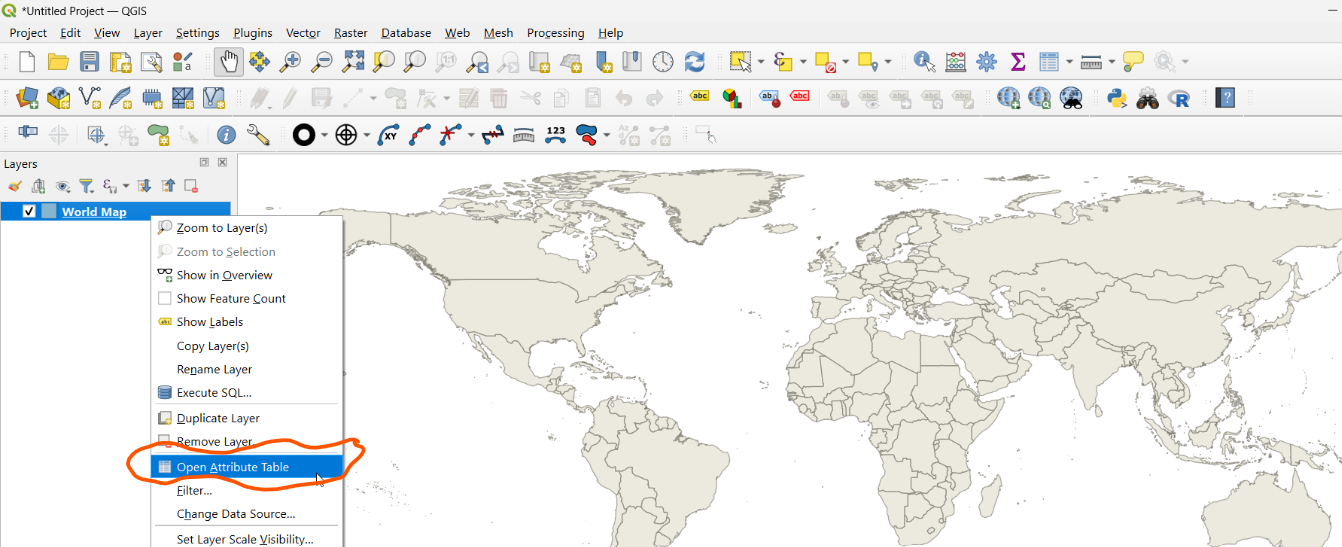
With the world map layer available, I explored the dataset by opening the layer attribute table. I needed to check if perhaps my layer had names of countries which I could use for creating the map. I opened the attribute table by right-clicking on the World Map layer in the Layers panel and choosing Open Attribute Table in the context menu:
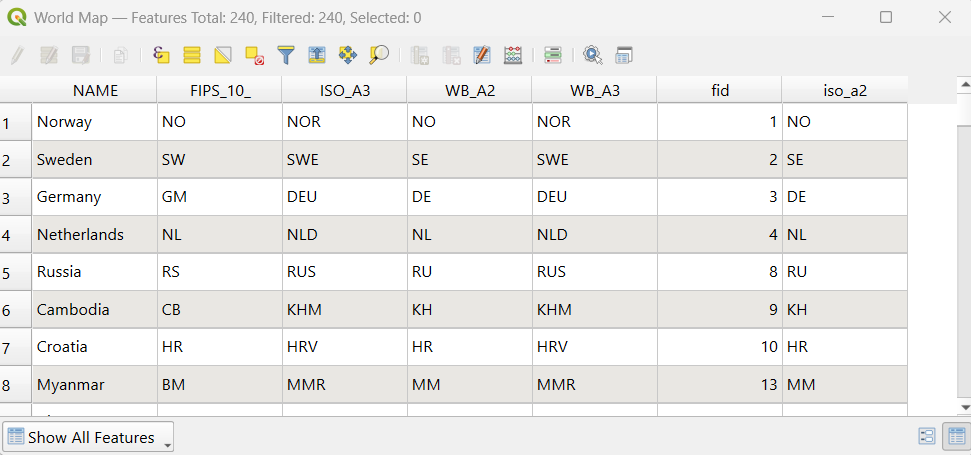
The attribute table had a column named NAME which had names of countries. I used the information available in the Wikipedia article to select my countries of interest from the attribute table based on this column.
Saving the QGIS project
At this point, I had started doing something in my project. I had added data to the project. I did not want to lose my work should anything happen (loss of power, or accidentally closing my project without saving). To save the project, I could use the keyboard shortcut Ctrl+S (on a Windows machine). Alternatively, I could click on the Project menu item and select Save Project As… 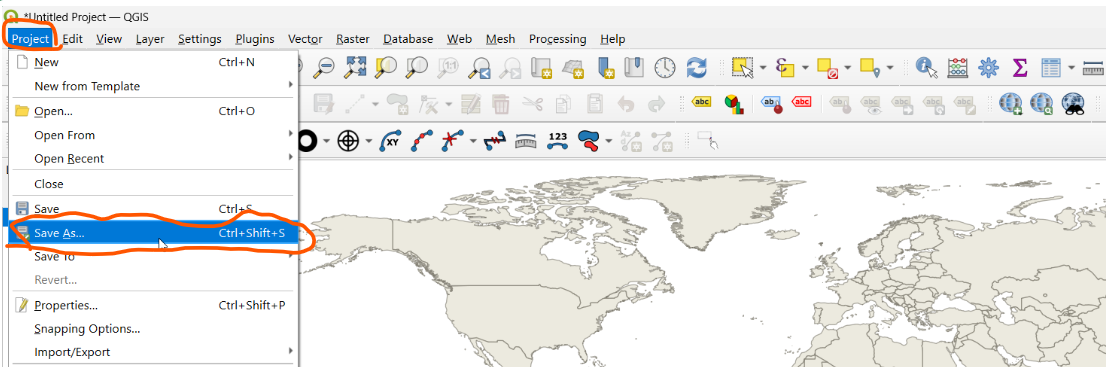
I saved the project as world-cup.
World cup participating nations in addition to winners
I did not just want to show winners of the previous tournaments, but other countries that had ever participated in the tournament as well. To do that, I needed to select the 83 countries that had ever participated in the tournament from the World Cup layer.
These were Algeria, Angola, Argentina, Australia, Austria, Belgium, Bolivia, Bosnia and Herzegovina, Brazil, Bulgaria, Cameroon, Canada, Chile, China, Colombia, Costa Rica, Croatia, Cuba, Czechoslovakia, Czech Republic, Denmark, DR Congo, East Germany, Ecuador, Egypt, El Salvador, England, France, Germany, West Germany, Ghana, Greece, Haiti, Honduras, Hungary, Iceland, Indonesia, Iran, Iraq, Israel, Italy, Ivory Coast, Jamaica, Japan, Kuwait, Mexico, Morocco, Netherlands, New Zealand, Nigeria, North Korea, Northern Ireland, Norway, Panama, Paraguay, Peru, Poland, Portugal, Qatar, Republic of Ireland, Romania, Russia, Saudi Arabia, Scotland, Senegal, Serbia, Slovakia, Slovenia, South Africa, South Korea, Soviet Union, Spain, Sweden, Switzerland, Togo, Trinidad and Tobago, Tunisia, Turkey, Ukraine, United Arab Emirates, United States, Uruguay, Wales, Yugoslavia.
Missing nations
Checking the list, I realised that some of these names represent teams that no longer exist in that form, such as Czechoslovakia, the Soviet Union, Yugoslavia, and East Germany, whose results are now attributed by FIFA to their recognized successor nations like the Czech Republic and Slovakia, Russia, Serbia, and unified Germany respectively.
Another thing was that England was not available in my World Map layer; rather, my layer had United Kingdom. I decided to use United Kingdom to represent England. By the way, only England has ever won the tournament within the United Kingdom.
Select the nations of interest from the World Map layer
There were a few issues I identified with my World Map layer. Some of the names of countries did not match. They had been coded differently. To solve these issues, I decided to use AI assistance to automatically identify all names of countries that did not match, and to align the names accordingly.
But before I could use AI, I needed to extract all country names, which I would compare with the list above. I couldn’t quickly find a way of copying all the names in the attribute table, so I resorted to exporting the layer to CSV.
I did this by right-clicking on the World Map layer in the Layers panel and then selecting Export > Save Feature As…
In the Save Vector Layer as… dialog, I chose the Comma Separated Value (CSV). Since the World Map layer contained more than the field of interest, specifying the field to save was necessary. 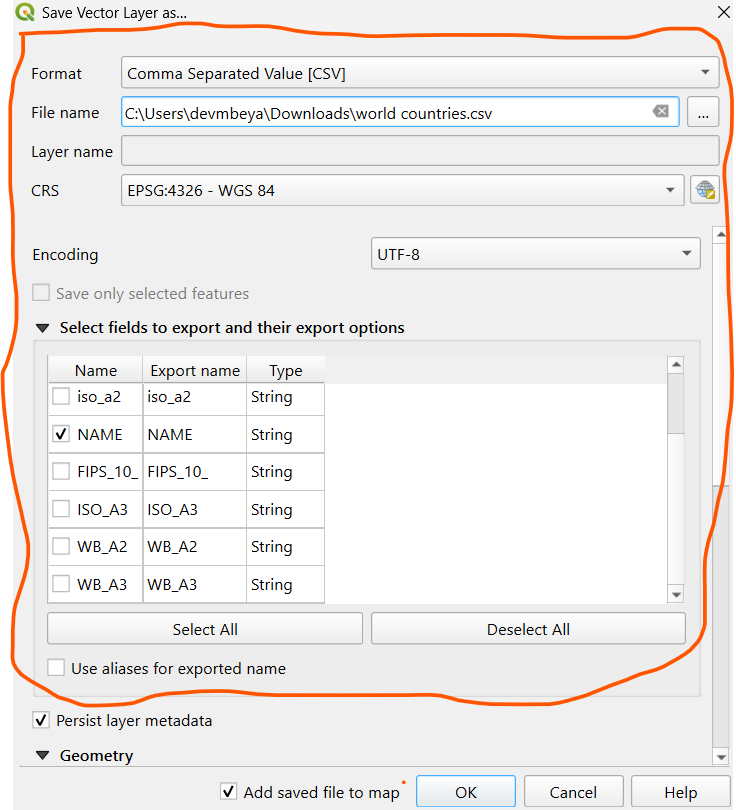
I saved the file as world countries.csv.
I was then ready to visit Claude.ai and enter a prompt that would help me sort the issues. Since I had my CSV file already, I attached it and then copied the names of countries that participated in the World Cup up to 2022, highlighted above, and framed my prompt as below:
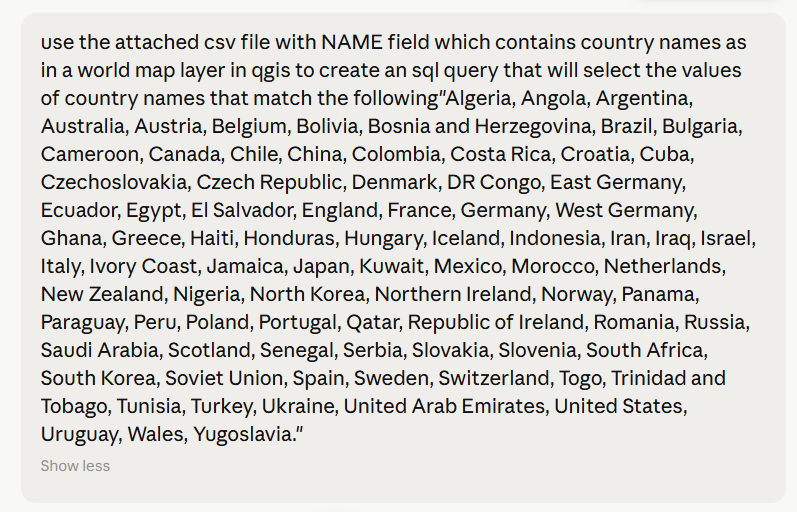
Claude identified names that required remapping to match the names in the World Map layer data:
| List | Layer’s NAME |
|---|---|
| Bosnia and Herzegovina | Bosnia and Herz. |
| Czech Republic | Czechia |
| DR Congo | Dem. Rep. Congo |
| Ivory Coast | Côte d’Ivoire |
| Republic of Ireland | Ireland |
| United States | United States of America |
Again, the following names did not have any matching names in the layer:
- Czechoslovakia, East Germany, West Germany, Soviet Union, Yugoslavia — these are historical/dissolved states, not present in modern admin-0 layers
- England, Northern Ireland, Scotland, Wales: these are constituent countries of the United Kingdom, not separate features (only “United Kingdom” exists)
I asked Claude to create an SQL query with corrected and matched names, which I would use to select all countries in QGIS that participated in the World Cup by 2022:
SELECT * FROM world_countries WHERE NAME IN ( 'Algeria', 'Angola', 'Argentina', 'Australia', 'Austria', 'Belgium', 'Bolivia', 'Bosnia and Herz.', 'Brazil', 'Bulgaria', 'Cameroon', 'Canada', 'Chile', 'China', 'Colombia', 'Costa Rica', 'Croatia', 'Cuba', 'Czechia', 'Denmark', 'Dem. Rep. Congo', 'Ecuador', 'Egypt', 'El Salvador', 'France', 'Germany', 'Ghana', 'Greece', 'Haiti', 'Honduras', 'Hungary', 'Iceland', 'Indonesia', 'Iran', 'Iraq', 'Israel', 'Italy', "Côte d'Ivoire", 'Jamaica', 'Japan', 'Kuwait', 'Mexico', 'Morocco', 'Netherlands', 'New Zealand', 'Nigeria', 'North Korea', 'Norway', 'Panama', 'Paraguay', 'Peru', 'Poland', 'Portugal', 'Qatar', 'Ireland', 'Romania', 'Russia', 'Saudi Arabia', 'Senegal', 'Serbia', 'Slovakia', 'Slovenia', 'South Africa', 'South Korea', 'Spain', 'Sweden', 'Switzerland', 'Togo', 'Trinidad and Tobago', 'Tunisia', 'Turkey', 'Ukraine', 'United Arab Emirates', 'United States of America', 'Uruguay', 'United Kingdom' );
In QGIS, I then opened the Query Builder by right-clicking on the World Map layer in the Layers panel and selecting Properties… > Source tab, then expanding Provide Feature Filter and clicking the Query Builder button:
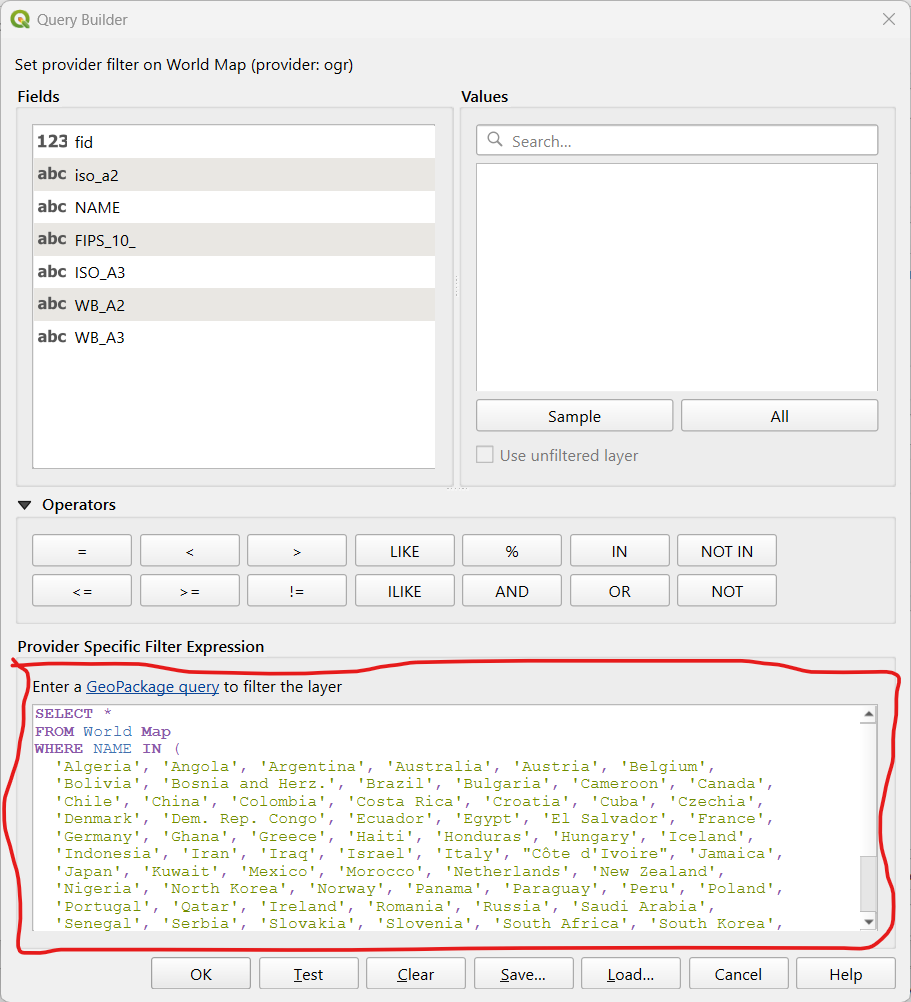
I then pasted the SQL expression from Claude into the query builder:
When I clicked the OK button, I received an error that the table World didn’t exist. You may get a different reference for the table name, such as world_countries. It appears the word Map is a reserved word in SQL (Map is part of SQL vocabulary).
I then renamed the World Map layer to world_map by right-clicking on the layer and opening the Source tab in the Layer Properties window, then editing the layer name.
I further exported the layer as a shapefile named world_map.
I needed to run the SQL query again, but this time working with the new shapefile, ensuring that my query used the correct layer name, world_map.
SELECT * FROM world_map WHERE NAME IN ( 'Algeria', 'Angola', 'Argentina', 'Australia', 'Austria', 'Belgium', 'Bolivia', 'Bosnia and Herz.', 'Brazil', 'Bulgaria', 'Cameroon', 'Canada', 'Chile', 'China', 'Colombia', 'Costa Rica', 'Croatia', 'Cuba', 'Czechia', 'Denmark', 'Dem. Rep. Congo', 'Ecuador', 'Egypt', 'El Salvador', 'France', 'Germany', 'Ghana', 'Greece', 'Haiti', 'Honduras', 'Hungary', 'Iceland', 'Indonesia', 'Iran', 'Iraq', 'Israel', 'Italy', 'Côte d''Ivoire', 'Jamaica', 'Japan', 'Kuwait', 'Mexico', 'Morocco', 'Netherlands', 'New Zealand', 'Nigeria', 'North Korea', 'Norway', 'Panama', 'Paraguay', 'Peru', 'Poland', 'Portugal', 'Qatar', 'Ireland', 'Romania', 'Russia', 'Saudi Arabia', 'Senegal', 'Serbia', 'Slovakia', 'Slovenia', 'South Africa', 'South Korea', 'Spain', 'Sweden', 'Switzerland', 'Togo', 'Trinidad and Tobago', 'Tunisia', 'Turkey', 'Ukraine', 'United Arab Emirates', 'United States of America', 'Uruguay', 'United Kingdom' )
76 rows/countries were selected. These represent the nations that participated in the World Cup tournament between 1930 and 2022.
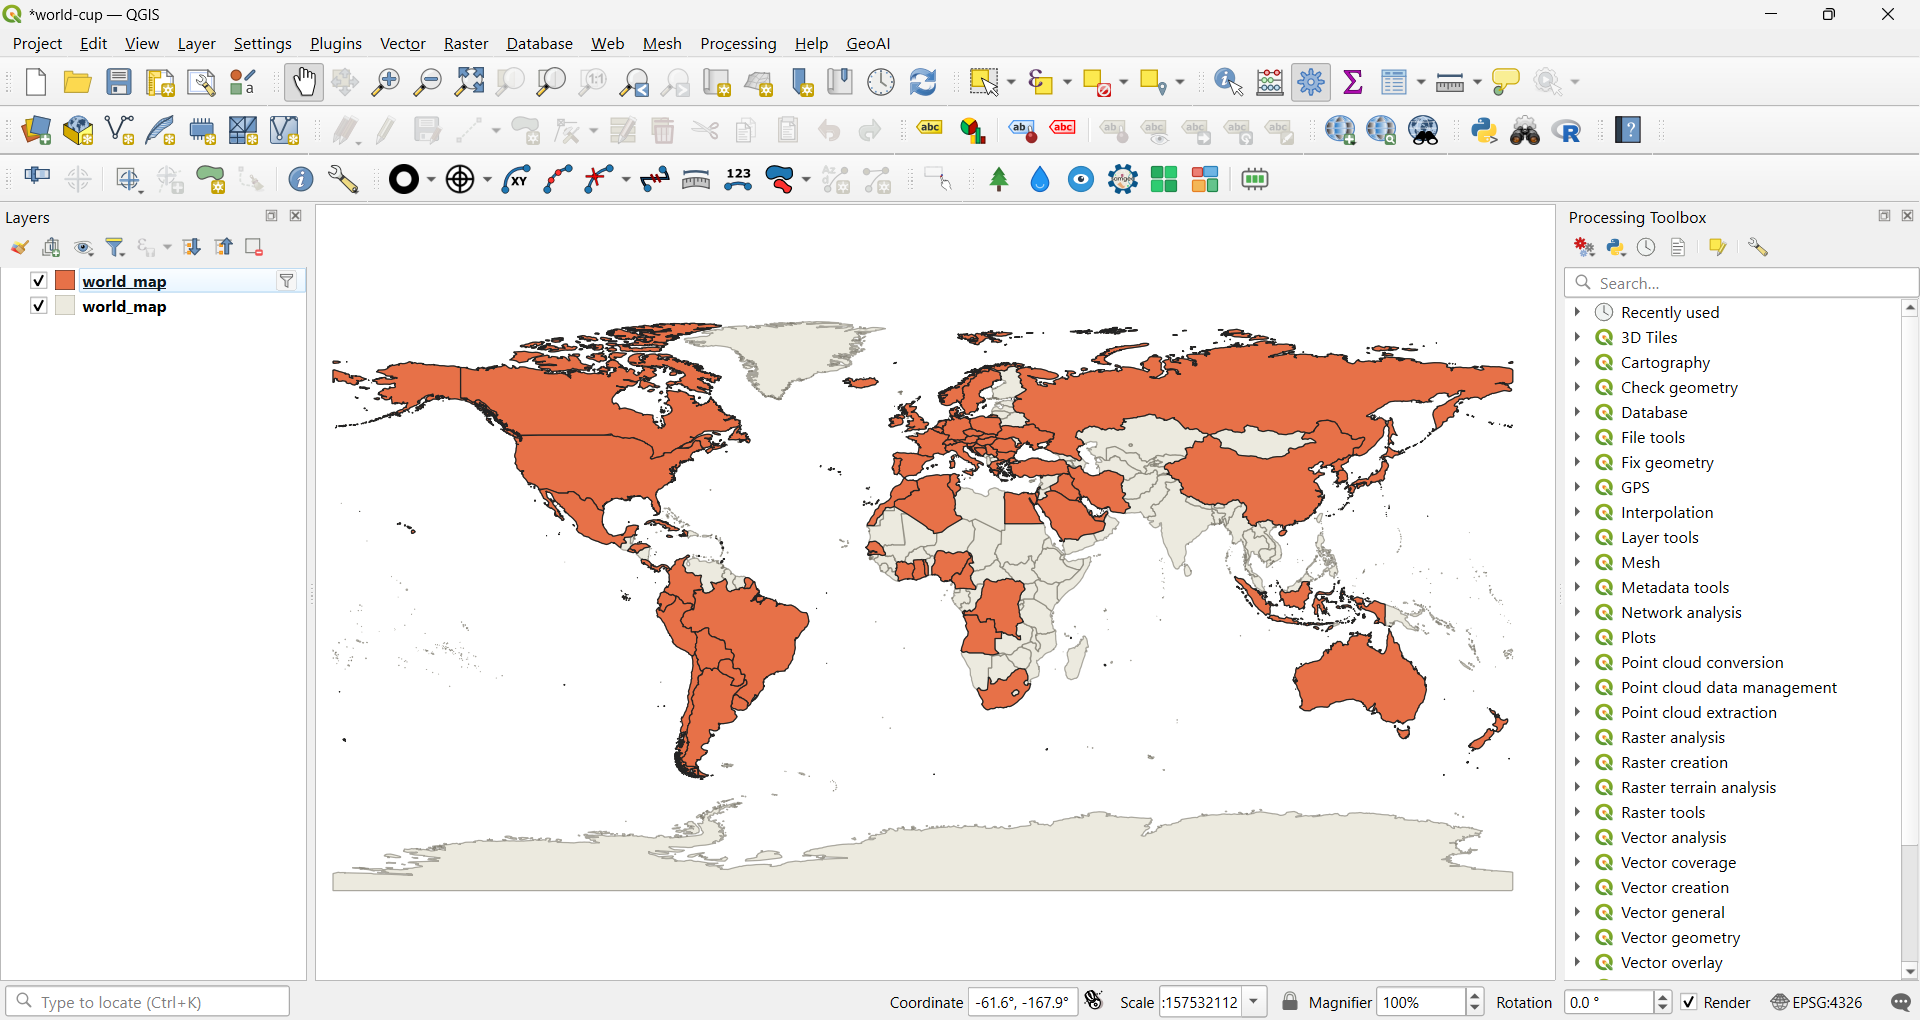
One more thing before I could start making the final map: I needed another layer for World Cup winners. Since I already had my World Cup participants layer, all I did was duplicate this same layer in the Layers panel, clear the previous SQL expression, and build another one that would select the names of nations that have ever won the World Cup tournament.
I renamed the filtered world_map layer to world_cup_participants. Then I created another layer from it by right-clicking on the layer and selecting Duplicate Layer:
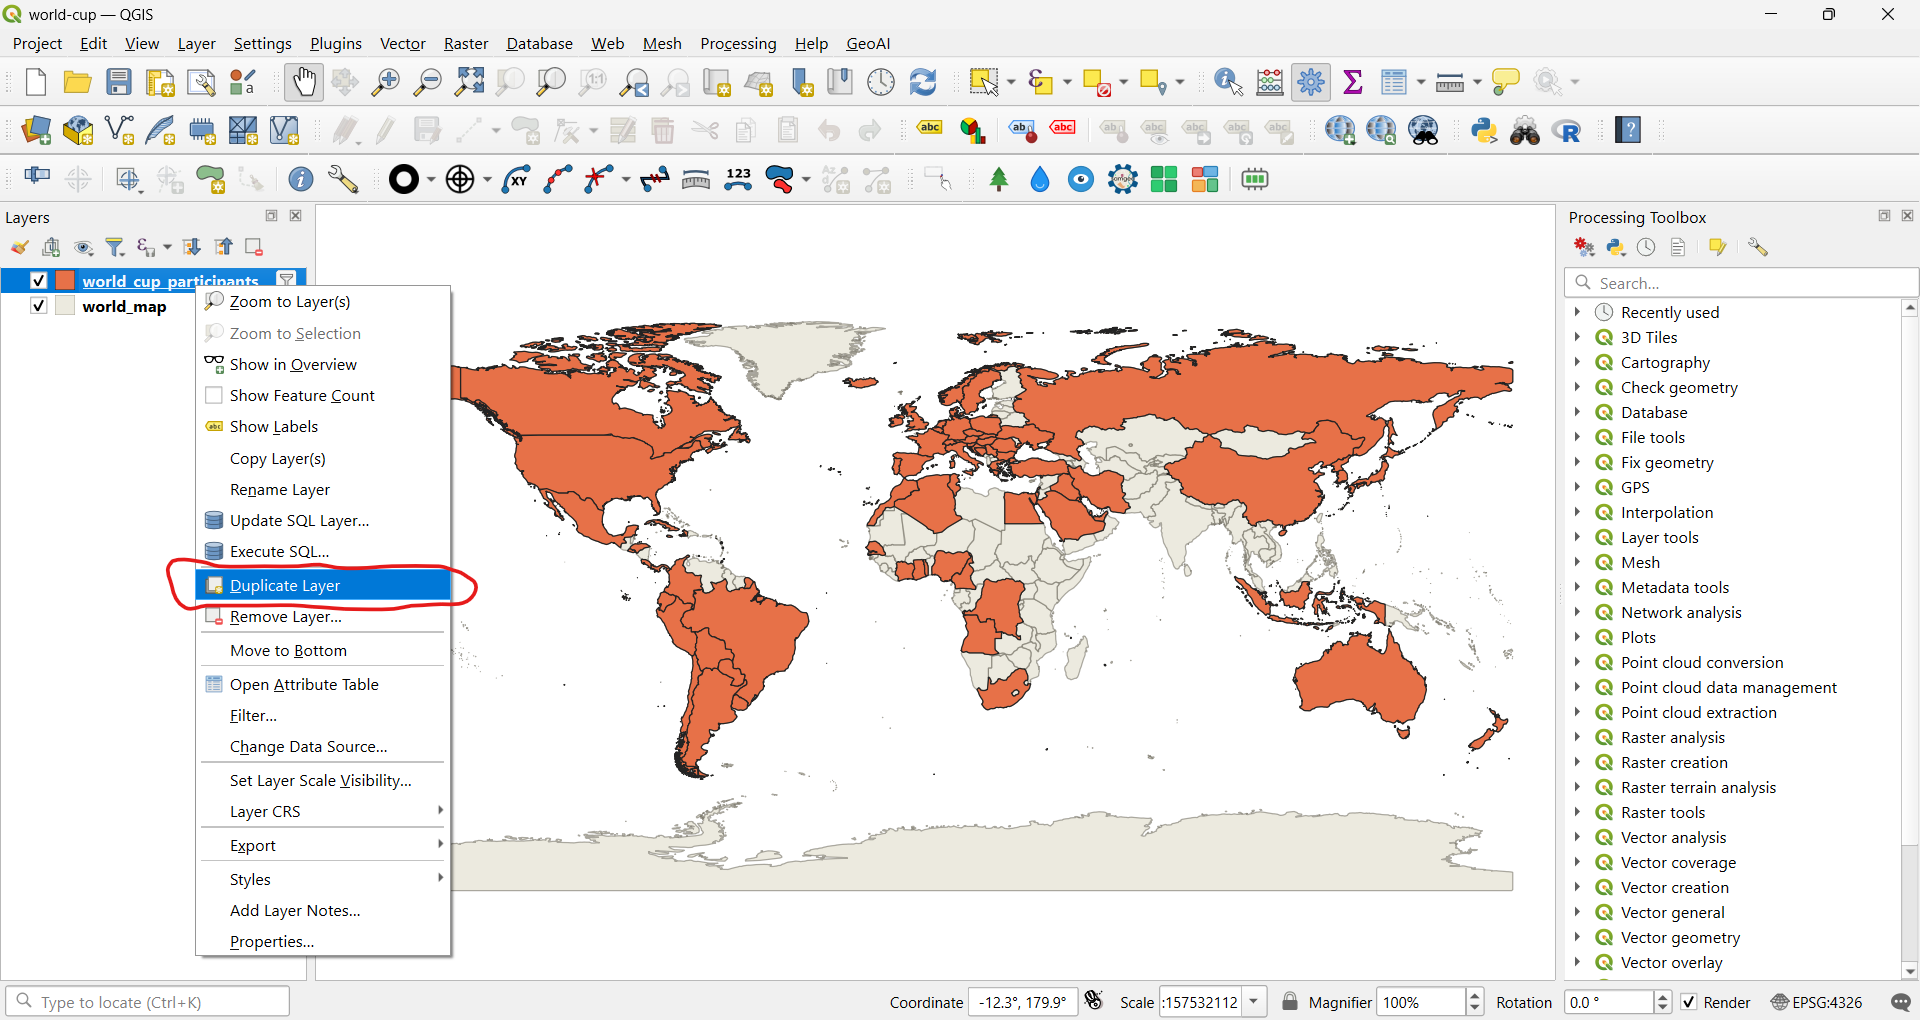
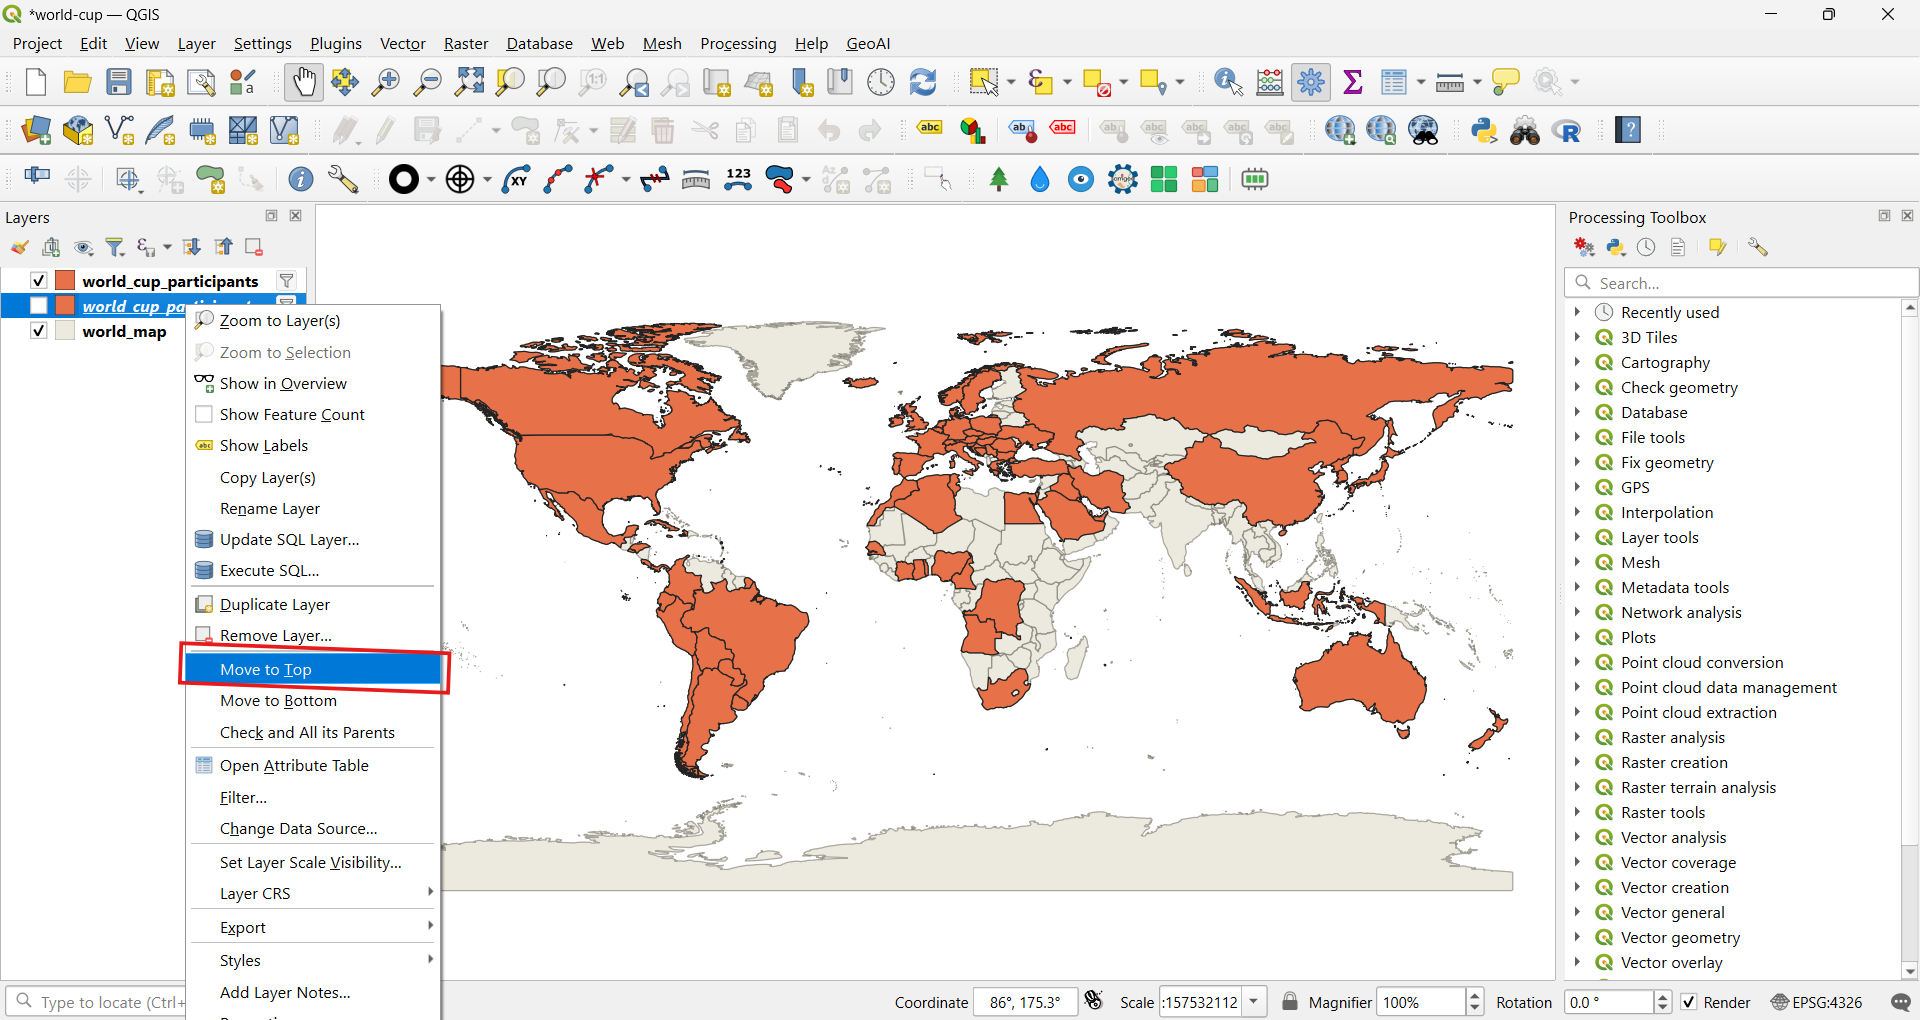
The duplicate layer draws at the bottom of the original layer in the Layers panel. I moved the duplicate to the top of all the layers in the Layers panel by right-clicking on it and selecting Move to Top:
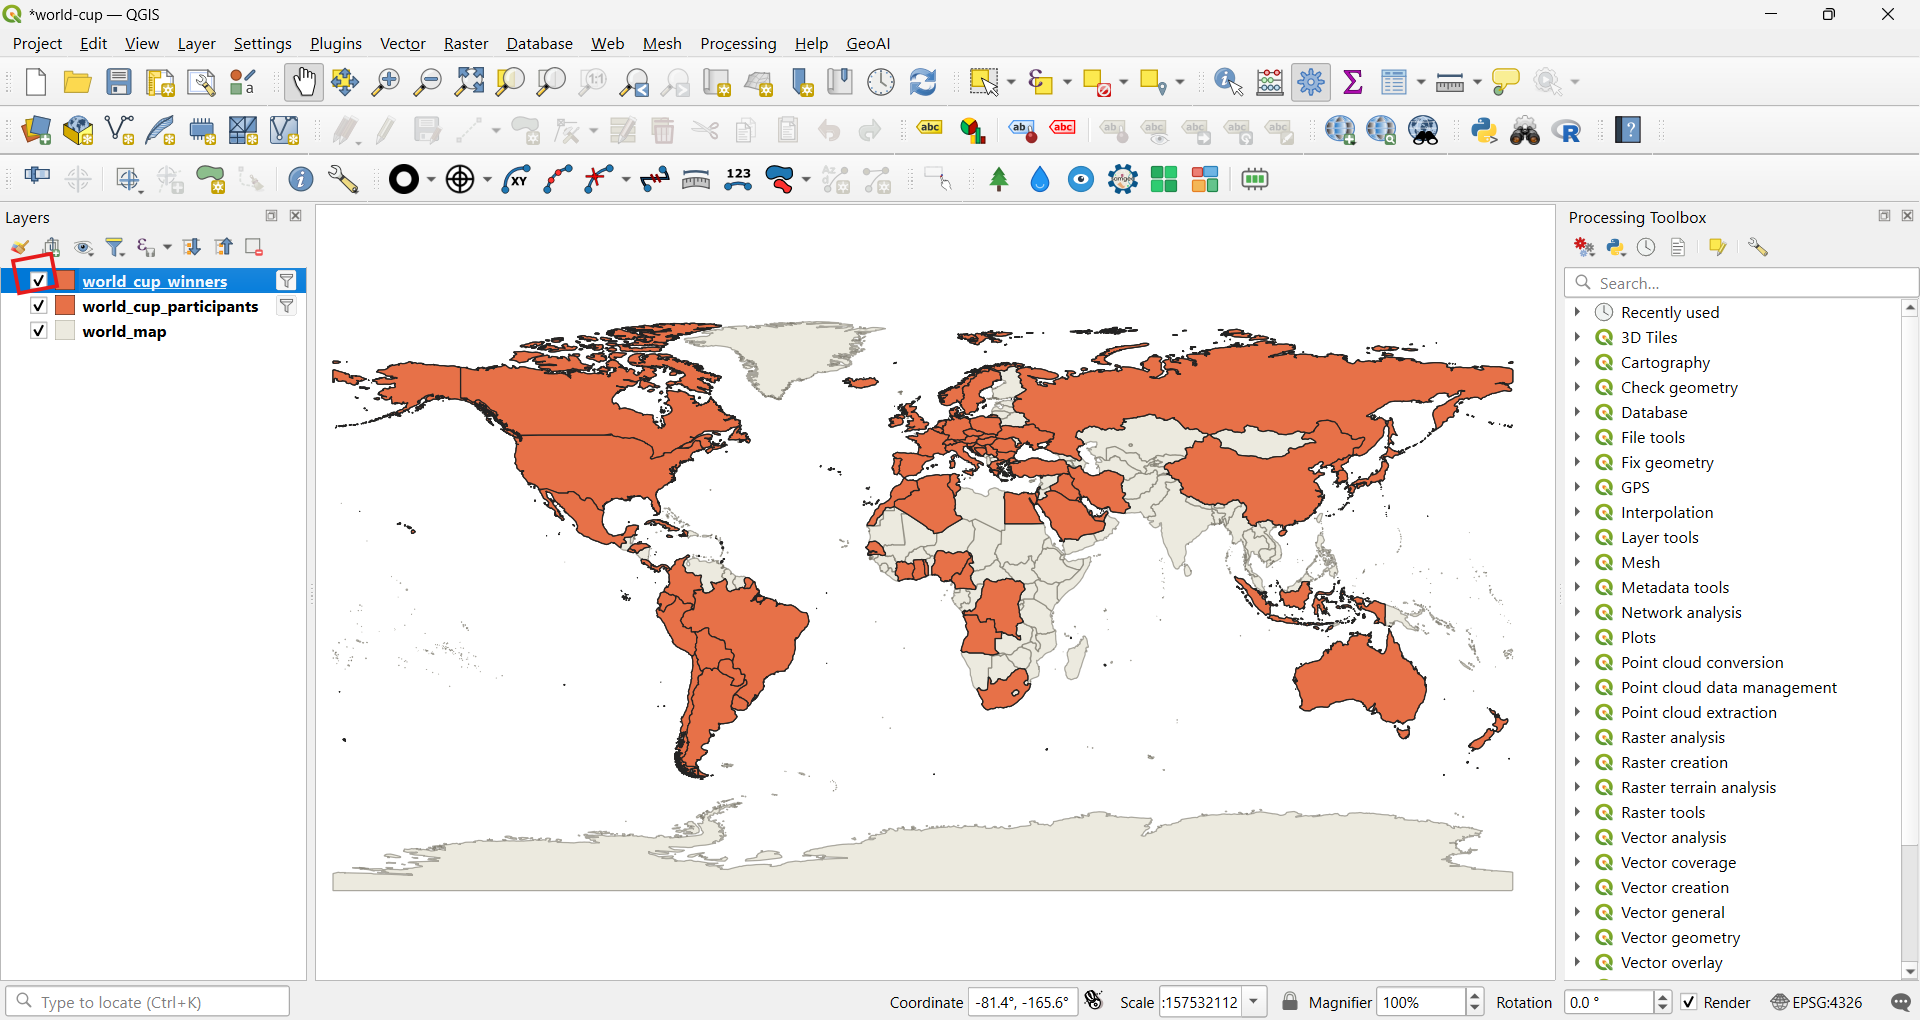
I then renamed the duplicate layer to world_cup_winners and made it active on the map by clicking the checkbox of the layer in the Layers panel:
To select countries that have ever won the World Cup, I needed to revise the SQL query as follows:
SELECT * FROM world_map WHERE NAME IN ( 'Argentina', 'Brazil', 'France', 'Germany', 'Italy', 'Spain', 'United Kingdom', 'Uruguay' )
Note that I kept the old name world_map in the SQL query, because although the layer is displayed as the duplicate in the panel, the actual file on disk is still world_map:
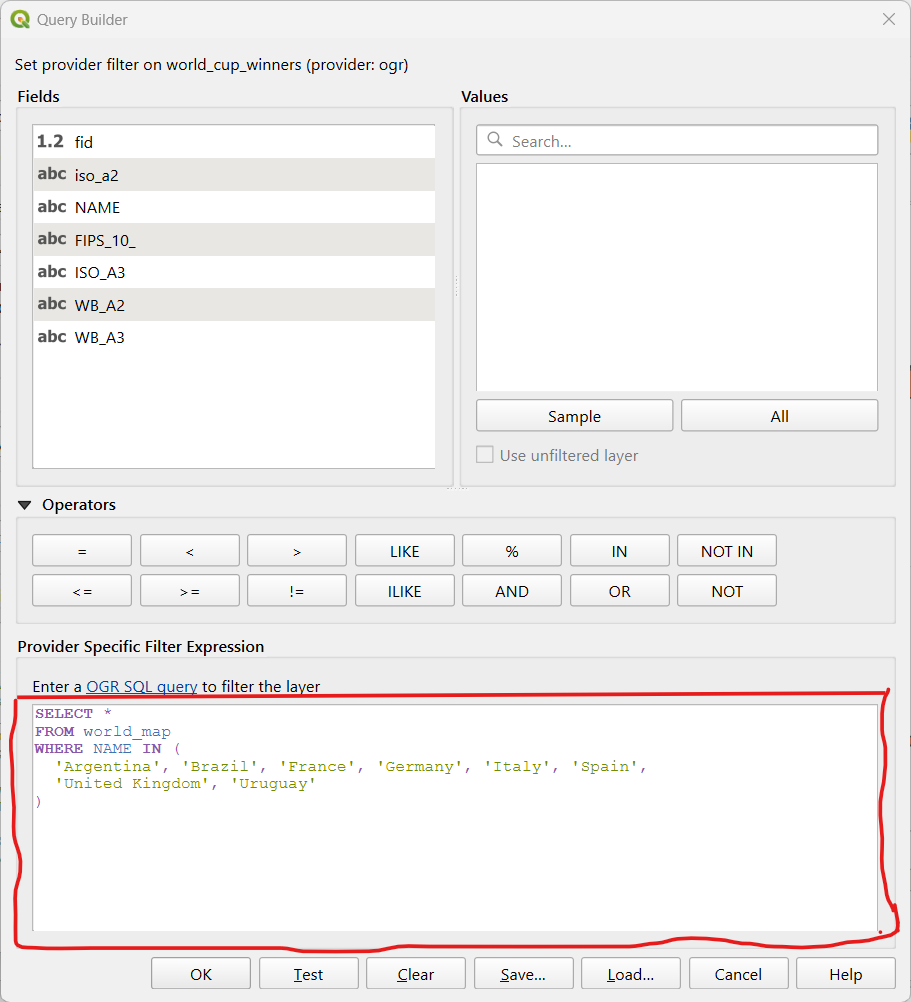
Again, here I used United Kingdom to represent England, and Germany to represent the former East Germany.
Unchecking the participants layer helped me clearly see the nations that had ever won the tournament. This was necessary because the world_cup_participants layer and the world_cup_winners layer had similar colors on the map:
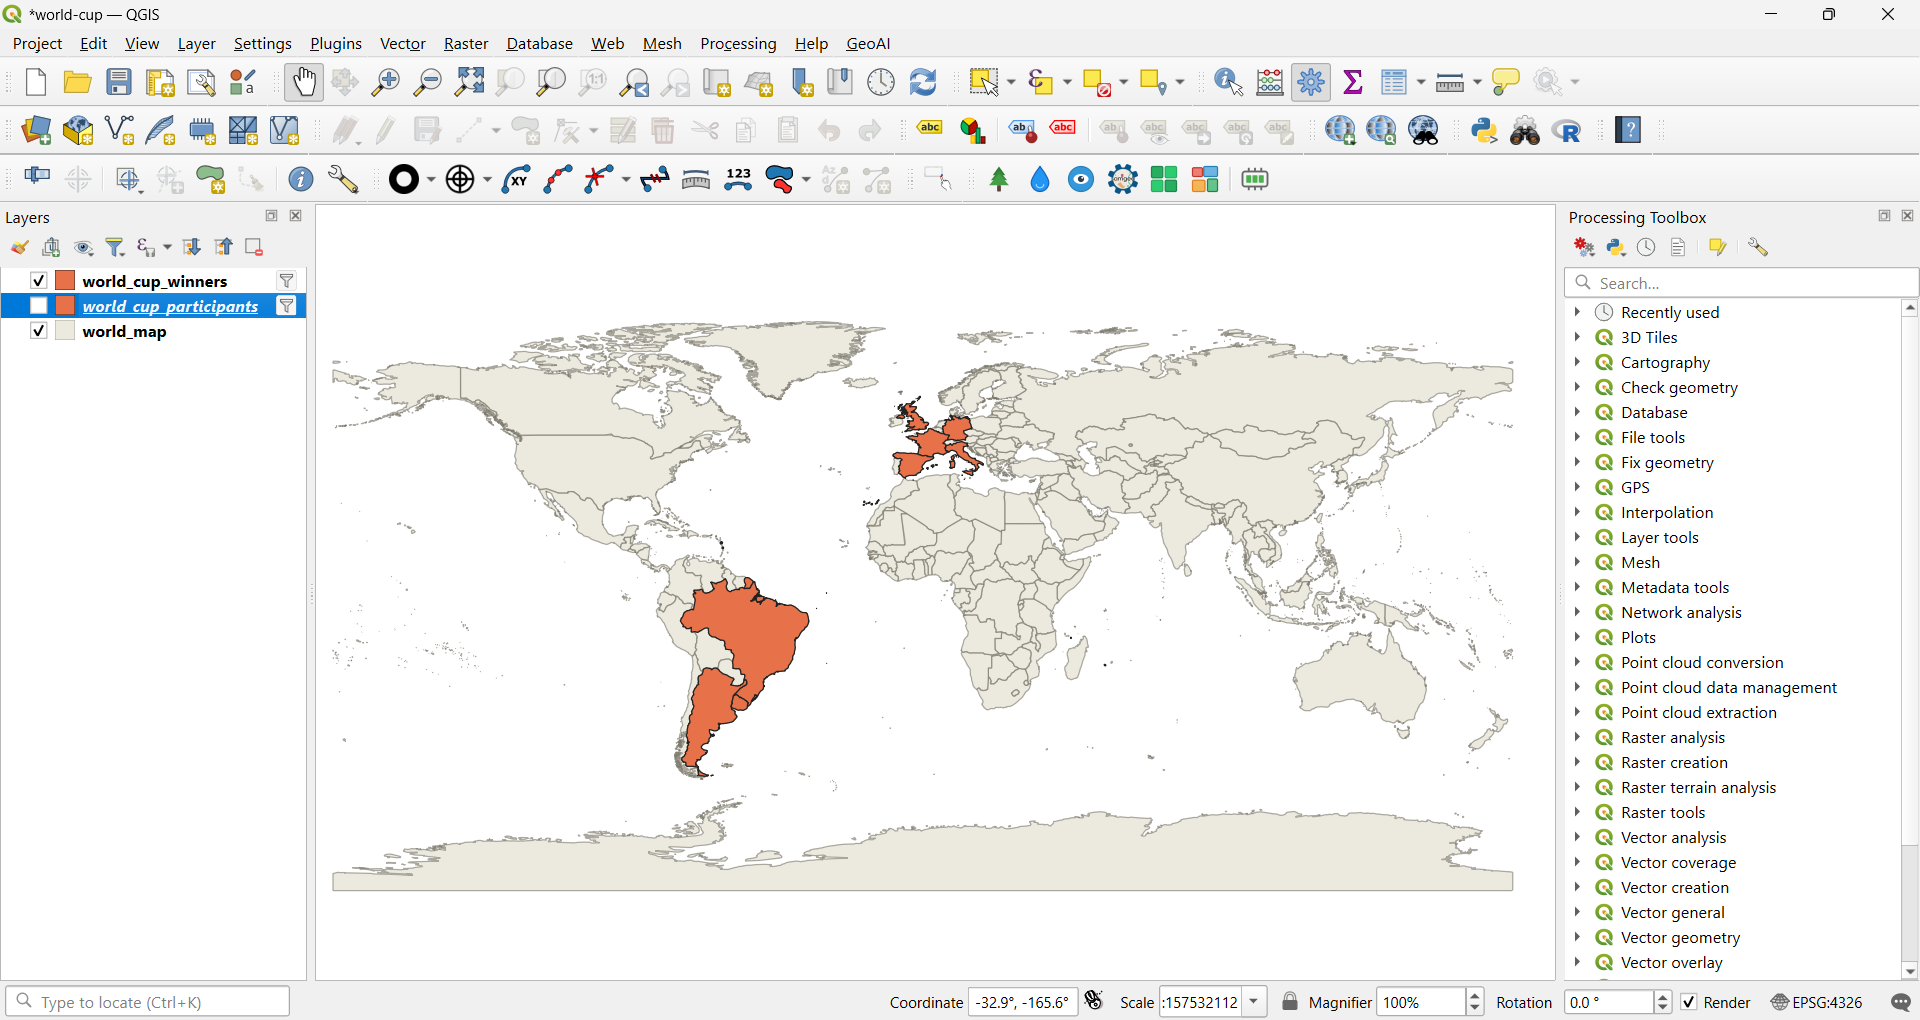
With all the map layers available in my QGIS project, I could then move on to make the final map.
Styling map layers for the final map
I decided to style my world_map layer with a gray fill color, #e0e0e0, and a white stroke color with a stroke width of 0.26. This was achieved by right-clicking on the world_map layer and opening the layer’s Properties. In the Layer Properties window, I selected the Symbology tab: 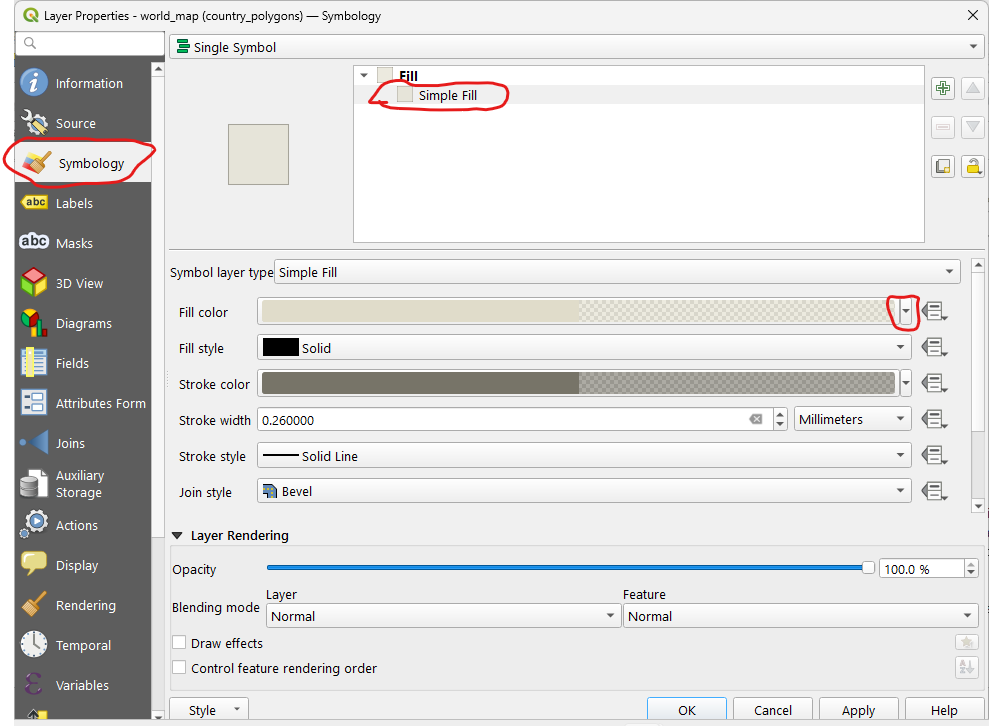
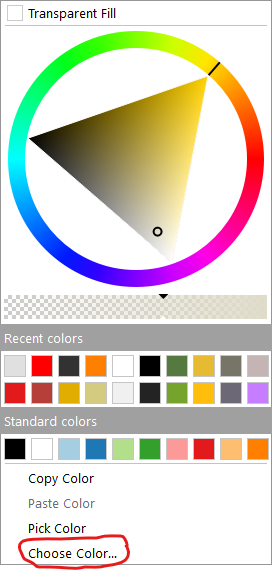
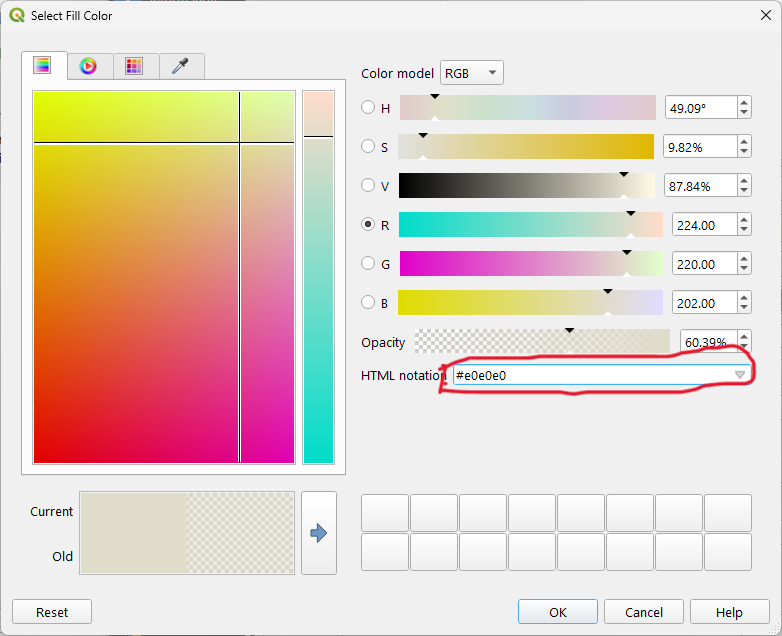
This layer was only useful for giving context, hence the choice of a non-dominant color.
I followed the same process to give a green color, #55793f, to World Cup participants, and a golden color, #e6ba32, to countries that have ever won the tournament:
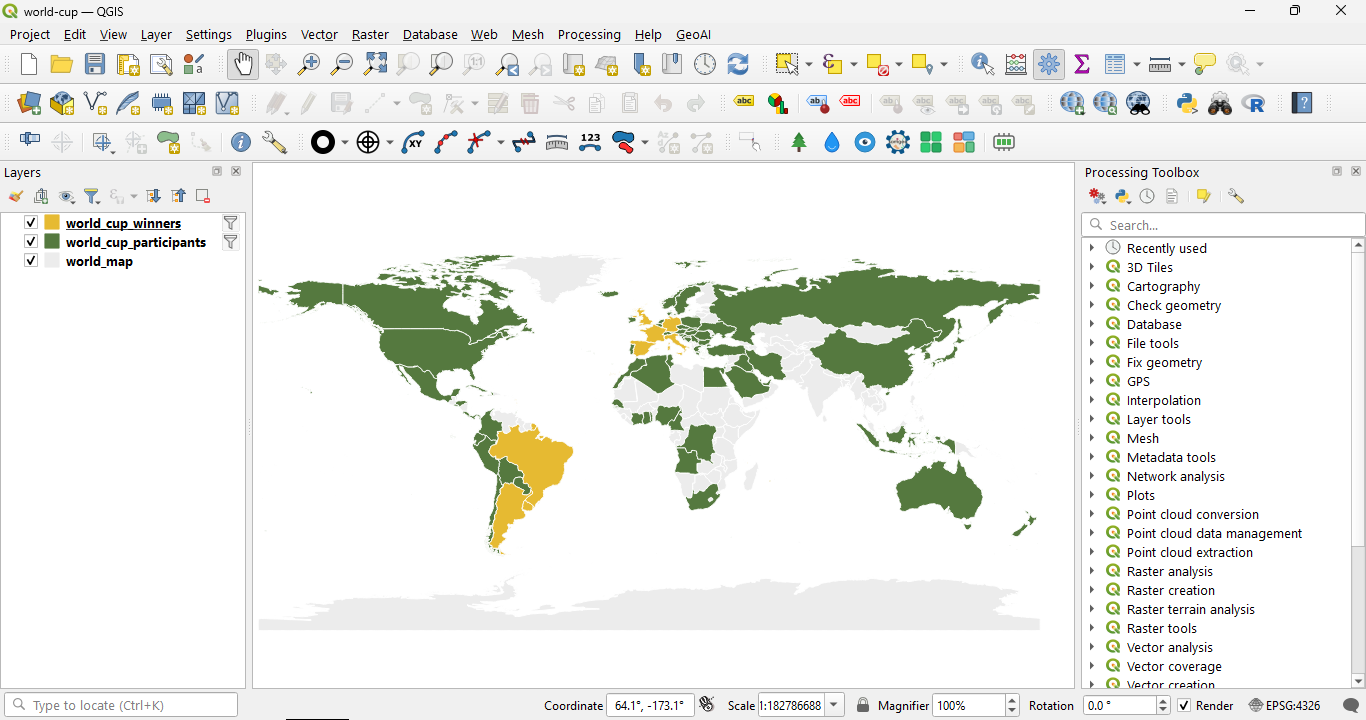
Convinced with my layer styles, I moved on to create the map layout.
Choosing a compromise projection
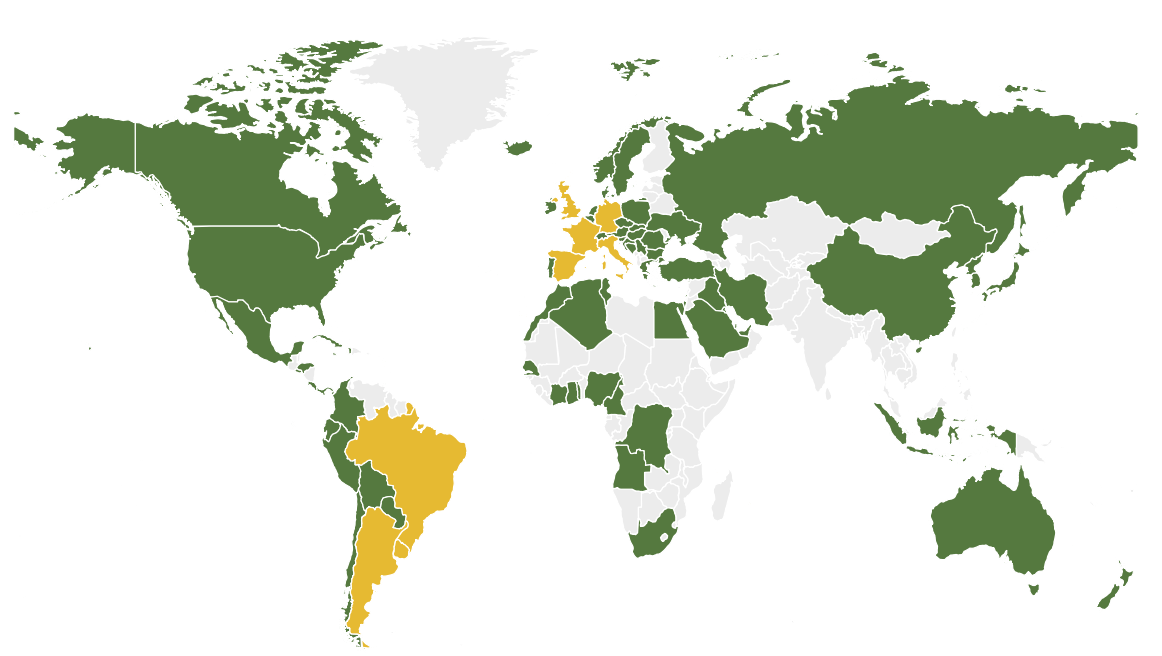
When creating a map of the world, I like choosing a map projection that minimises the distortion of landmasses. For this map, I chose the Gall Stereographic map projection, ESRI:54016, which is a cylindrical map projection developed by Scottish clergyman James Gall in 1855. It’s a compromise projection which is neither conformal (doesn’t preserve shape/angles) nor equal-area (doesn’t preserve area). It’s meant to balance distortion reasonably across the whole map, similar in spirit to the Robinson or Miller projections.
By default my map was not projected — it had the geographic coordinate system, EPSG:4326. To fix this, I opened the project’s properties:
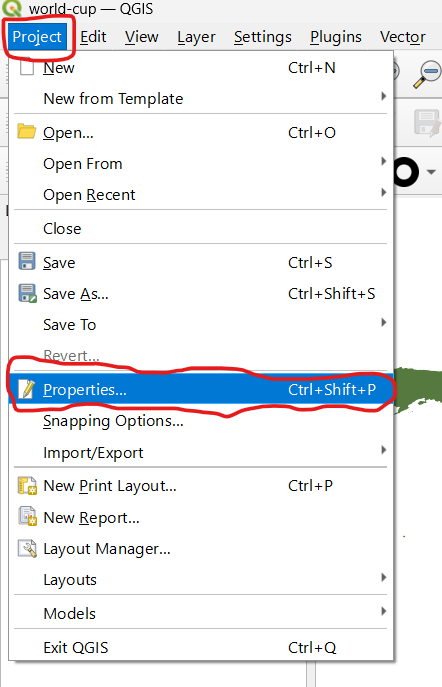
and then searched for and selected ESRI:54016 in the CRS tab:
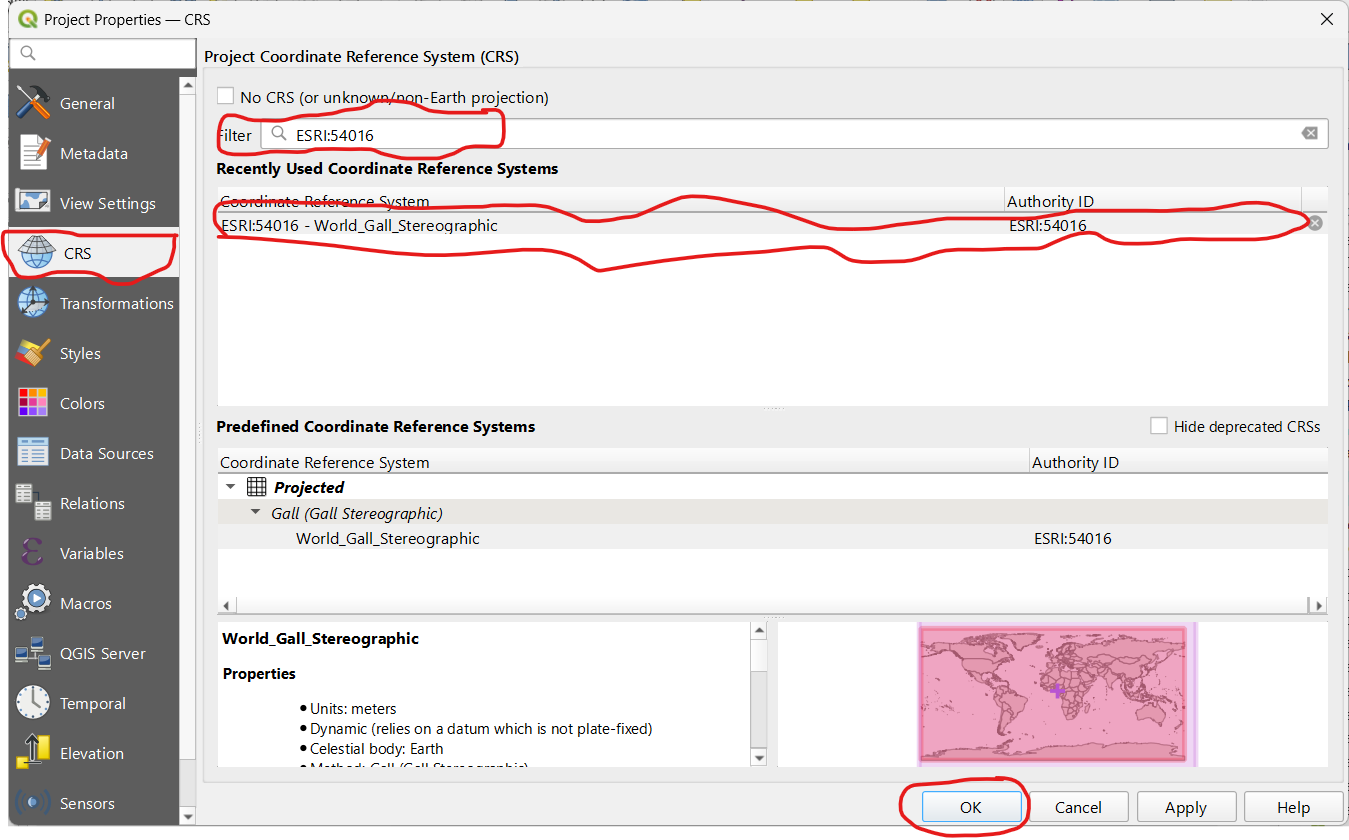
giving me the desired look:
At this point, I was ready to move on to the Print Layout to make the final map.
Map layout
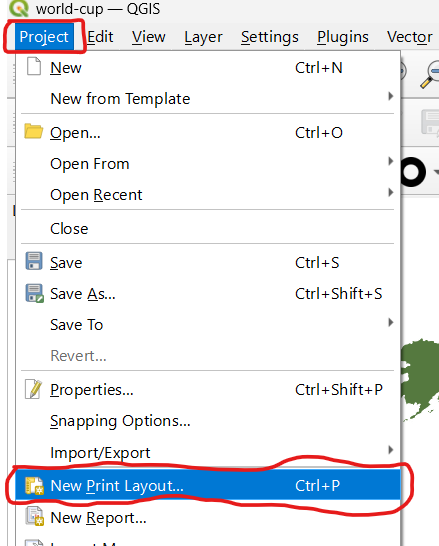
The Print Layout is opened via the Project menu item:
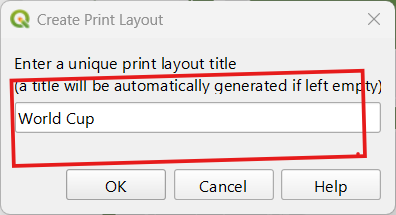
I named the new Print Layout World Cup:
I remembered that I had not labelled my map polygons. I went back to my map and, after right-clicking on the world_cup_participants layer in the Layers panel, I selected Show Labels in the context menu:
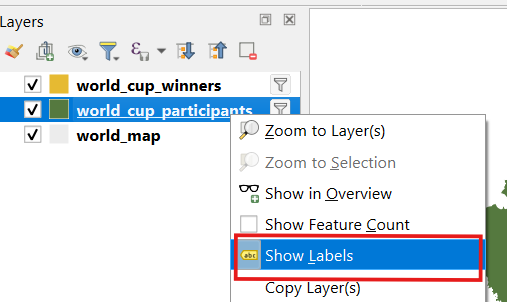
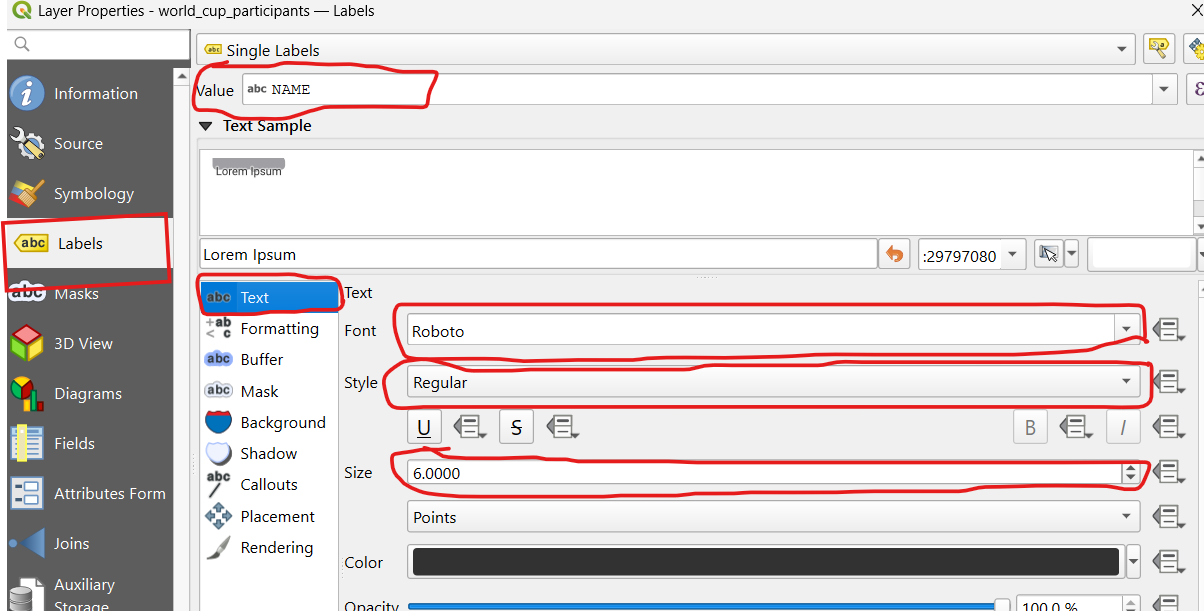
Nothing showed on the map even after I had selected Show Labels. I needed to tell QGIS which field values would be used to label the polygons. To do that, I opened the Layer Properties of the world_cup_participants layer. In the Layer Properties dialog, I selected the Labels tab. In the Value field, I selected the NAME field. For the Text, I selected the Roboto font, Regular style, and reduced the default size to 6.
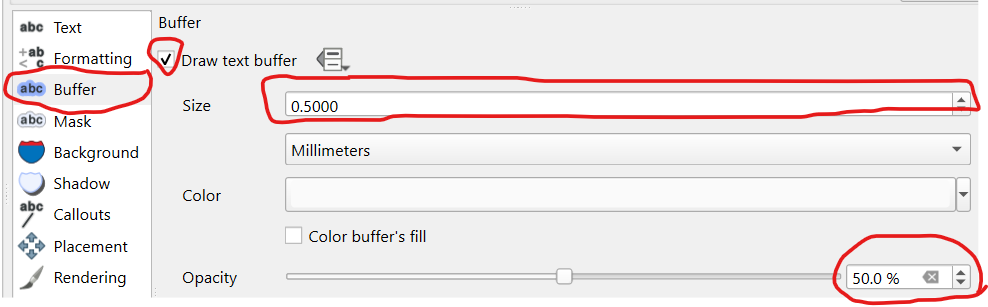
To make sure the labels stood out against the background, I gave the text a white buffer of size 0.5 with 50% opacity:
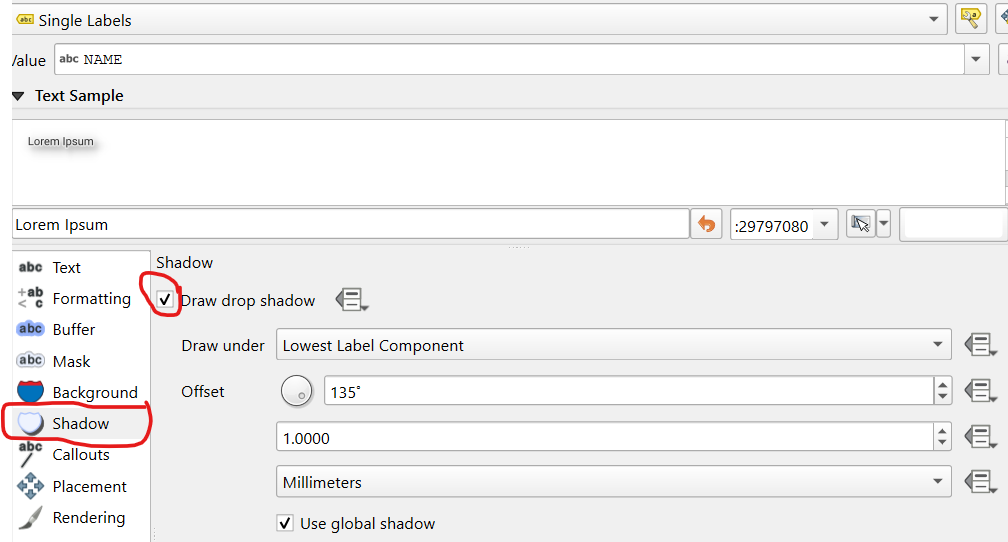
As a final touch to my labels, I enabled Draw drop shadow:
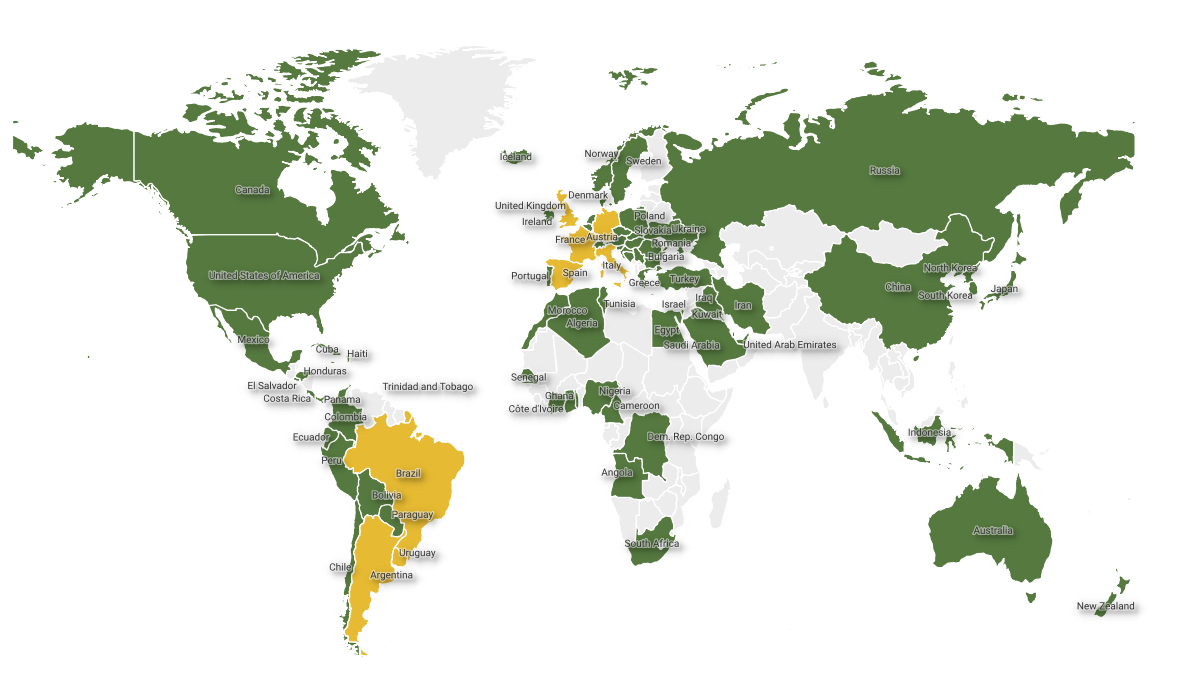
I was happy with my map labels, so I continued working in the Print Layout:
Adding items to the Map Layout
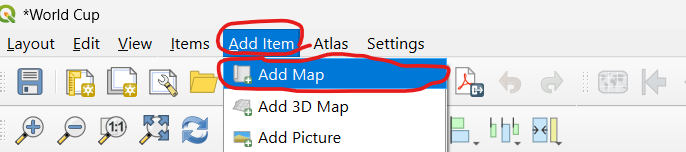
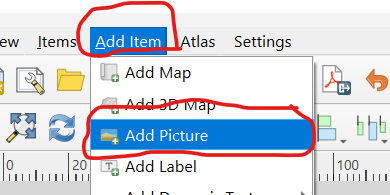
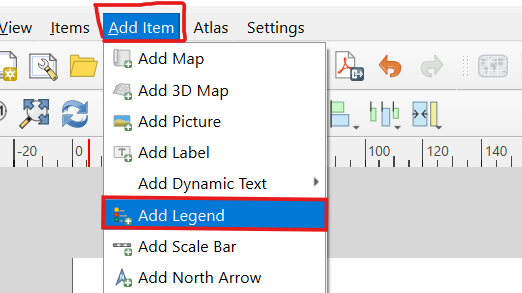
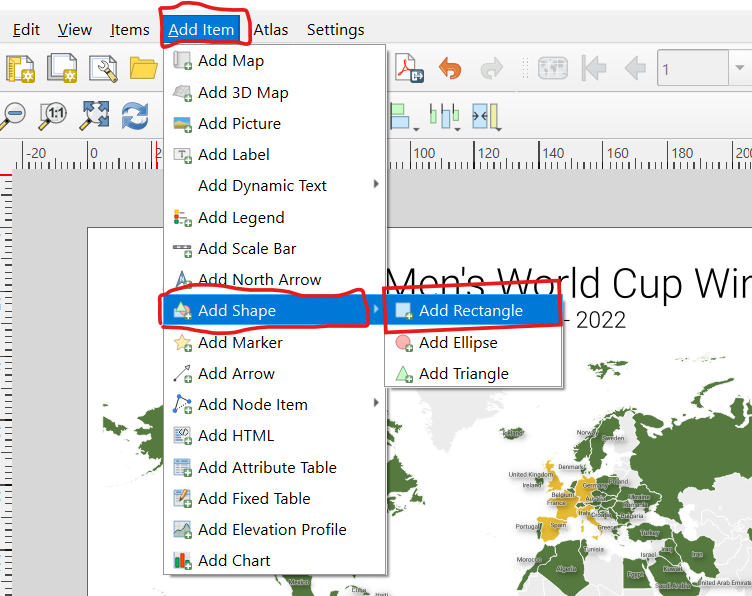
To add the map to the layout, I used the Add Item menu and then selected Add Map:
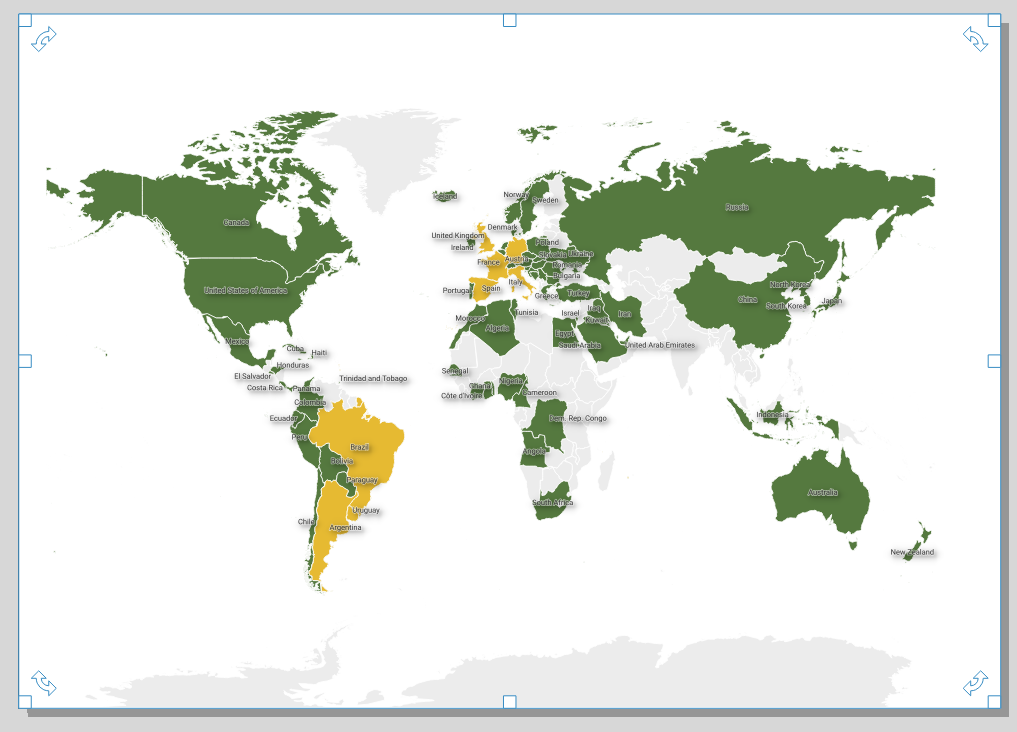
Just doing that didn’t add the map to the page. I needed to draw a rectangle on the blank page — after my mouse cursor had turned into a cross-hair, ensuring that the rectangle filled the whole page:
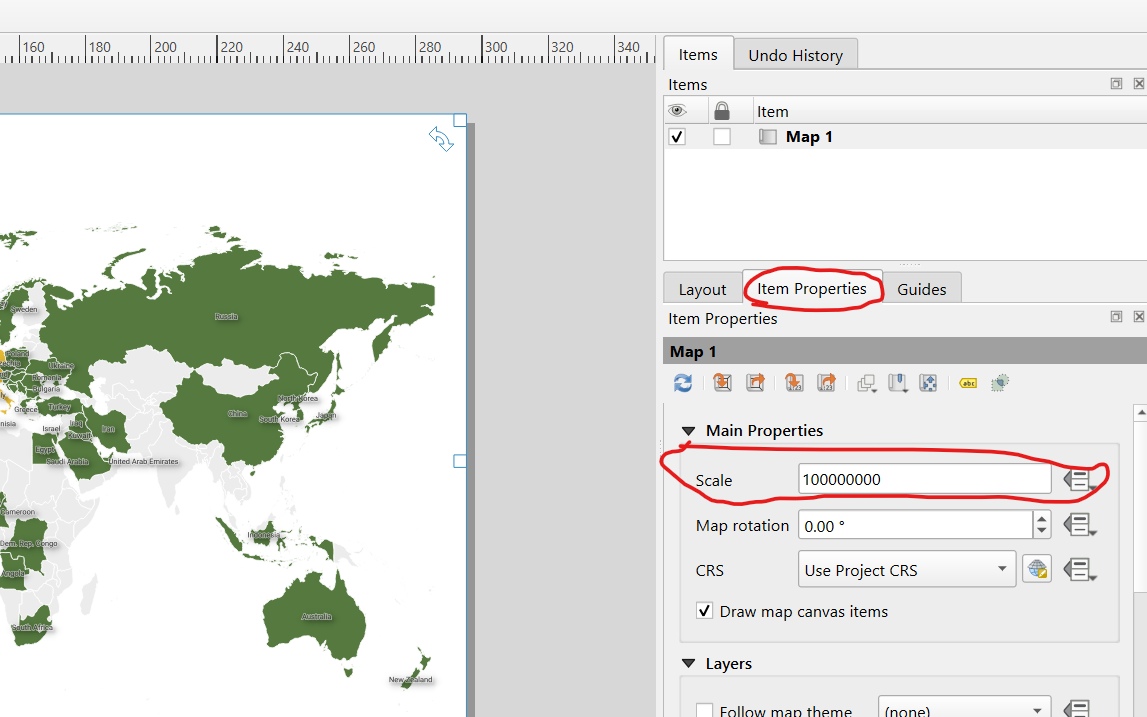
Before I could add more map elements to the layout, I set the map scale to 100000000:
A good map should be balanced, meaning the map body should be centered. I used the Move Item Content tool to move the map body to the center of the page:
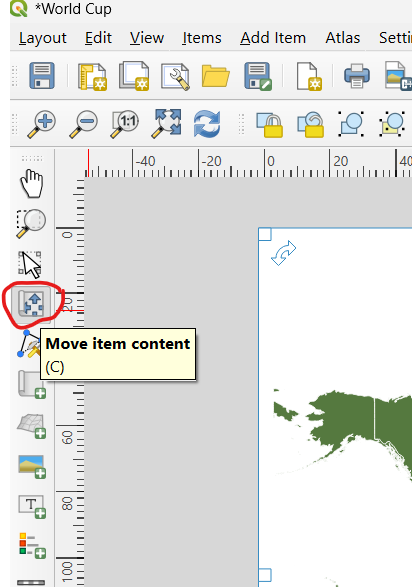
I disregarded Antarctica while repositioning the map, since it only provided context to the map.
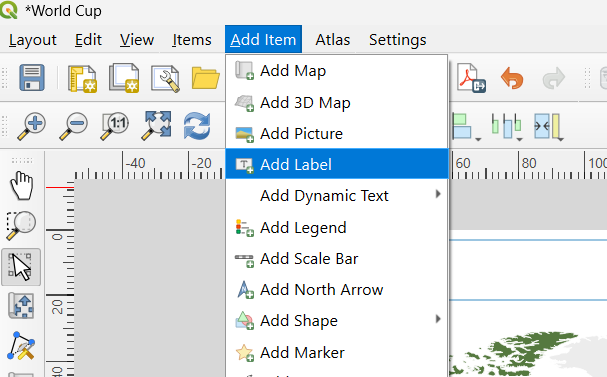
To add the map title, I used the Add Item menu and selected the Add Label tool:
Again, drawing the rectangle at the top of the page: 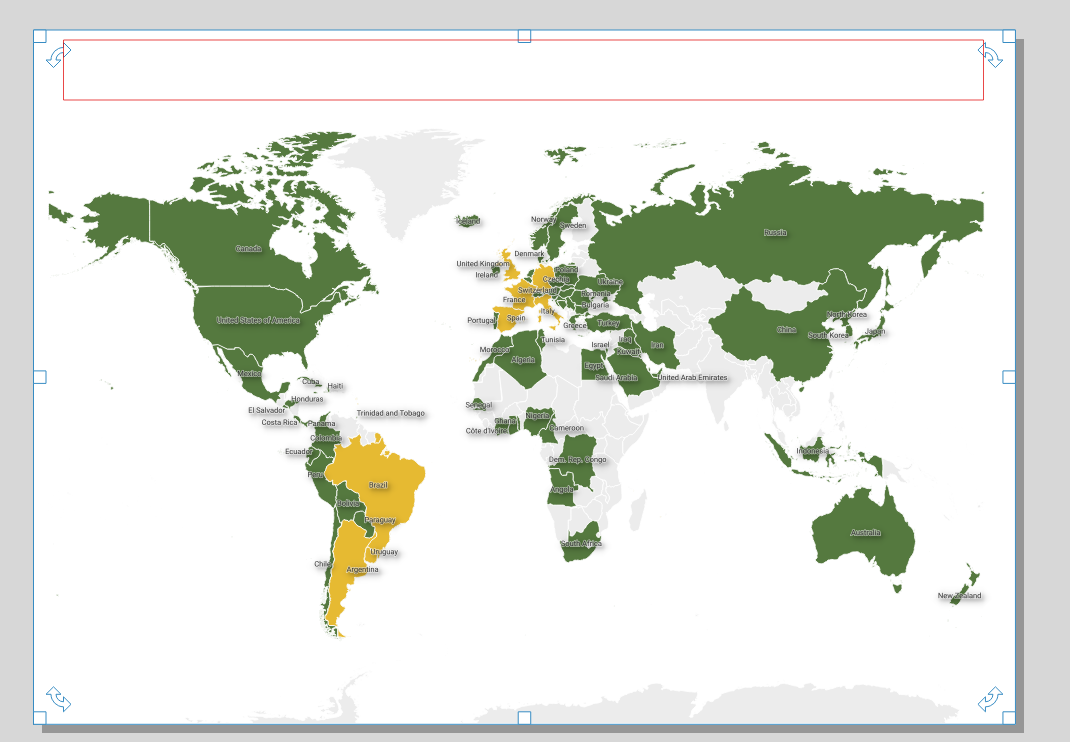
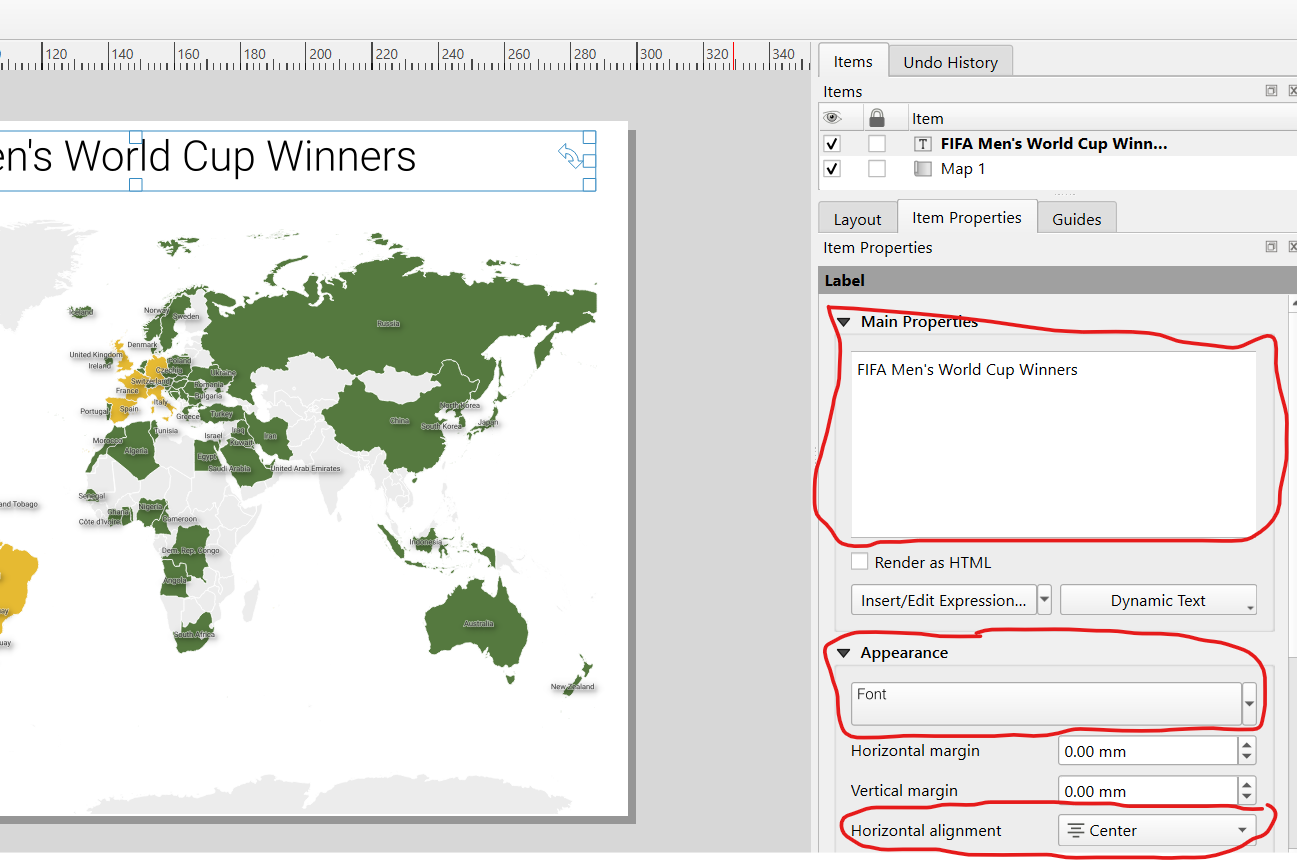
I changed the default text to FIFA Men's World Cup Winners and changed the font to Roboto, giving it the Light style and a font size of 36, with horizontal center alignment:
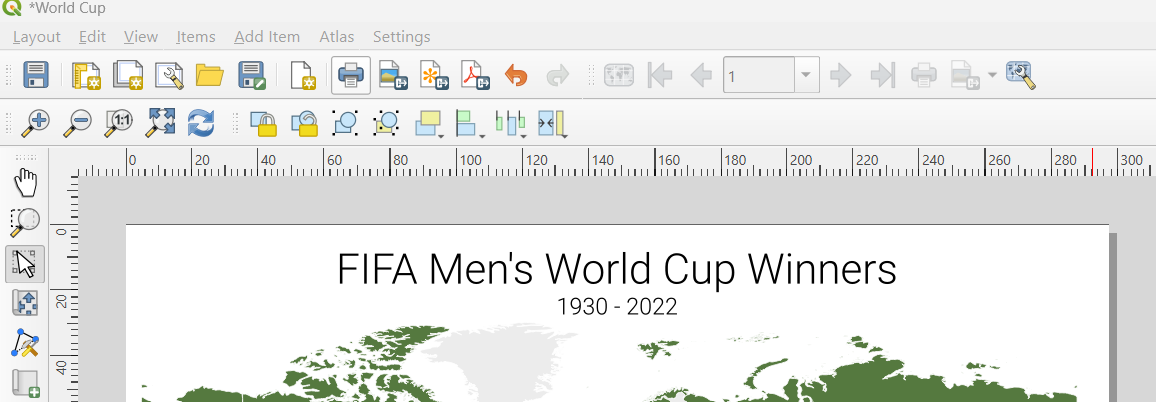
A map title should tell us what, when, and where. I added a subtitle to the map, maintaining a similar font to the main title but reducing the font size to 20:
Adding picture items
I wanted my map to carry the soccer branding, so I added a picture item to the left of the map title:
I selected the soccer SVG symbol from the SVG Images:
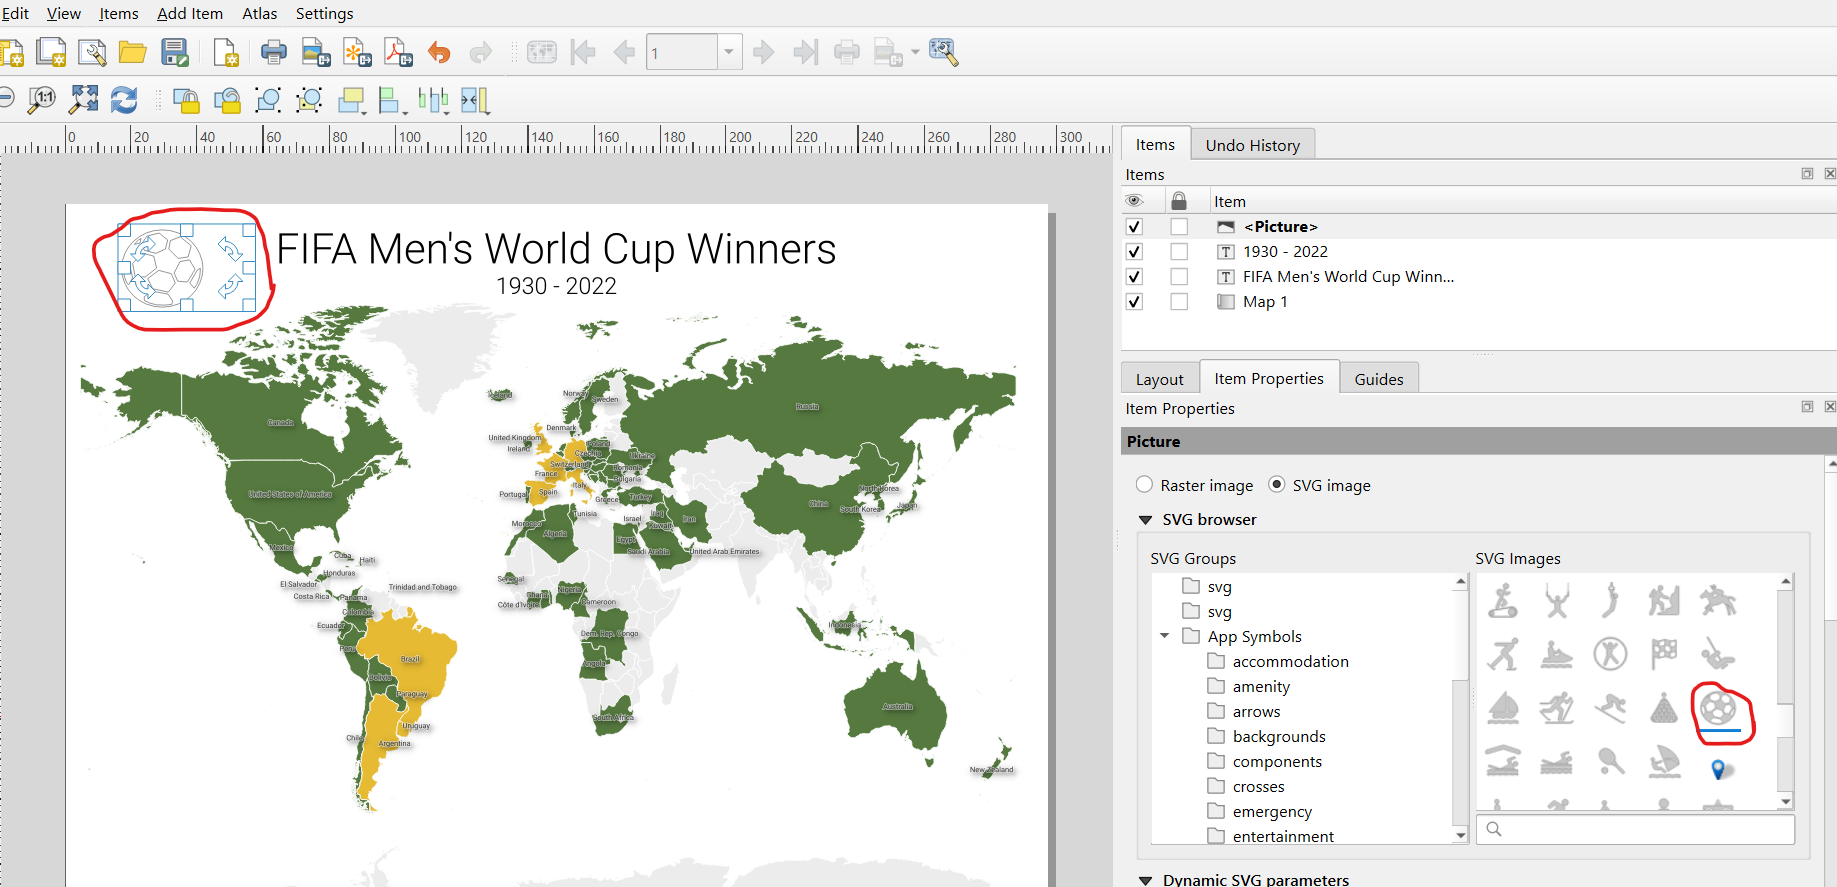
and resized the SVG image appropriately.
Since the map is about World Cup winners and participants, adding something that depicts championship felt appropriate. I decided to add a trophy image to the right of the title. The trophy image can be downloaded from here:
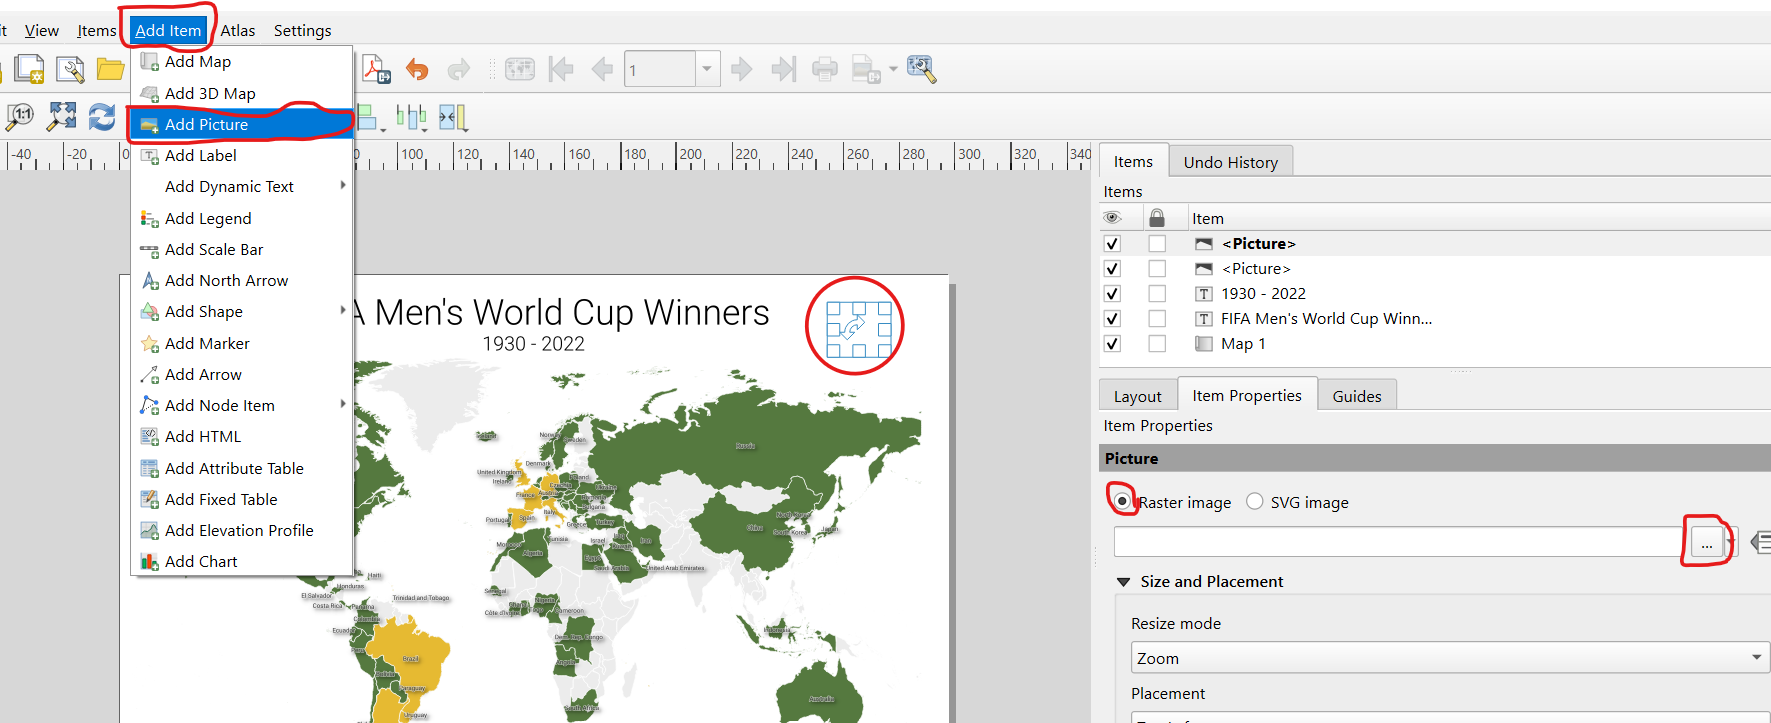
It was necessary to keep the icon at a minimal size.
Adding a map legend
My map lacked a legend, which defines exactly what each symbol, color, and line represents on the map. I added the legend and placed it at the bottom-center of the map, just below the African continent:
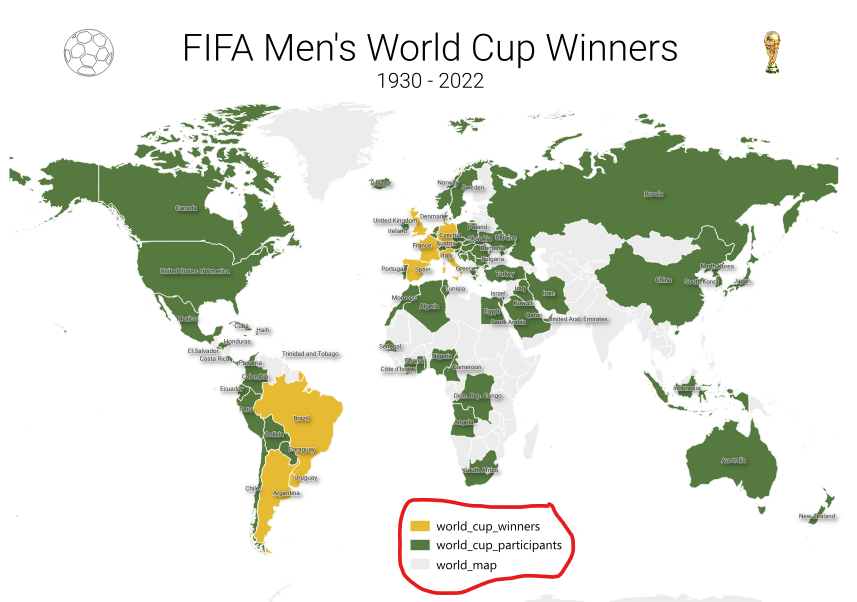
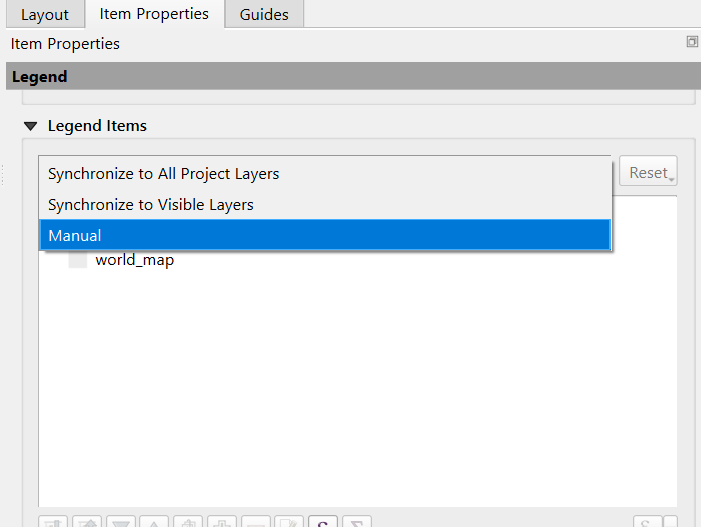
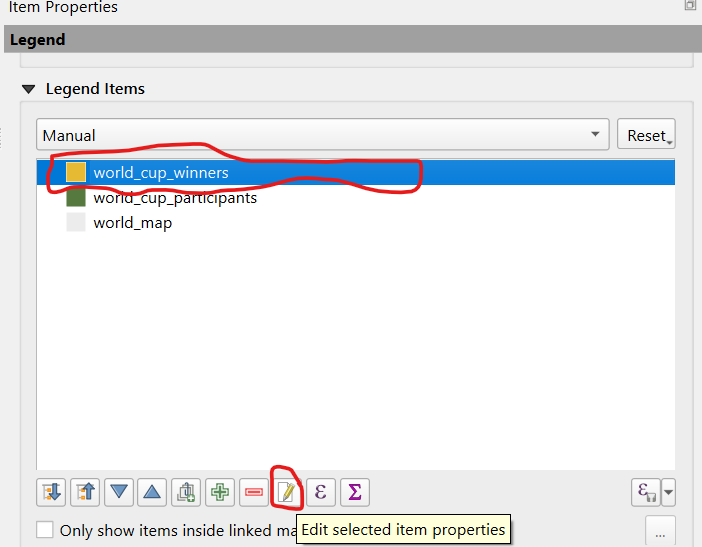
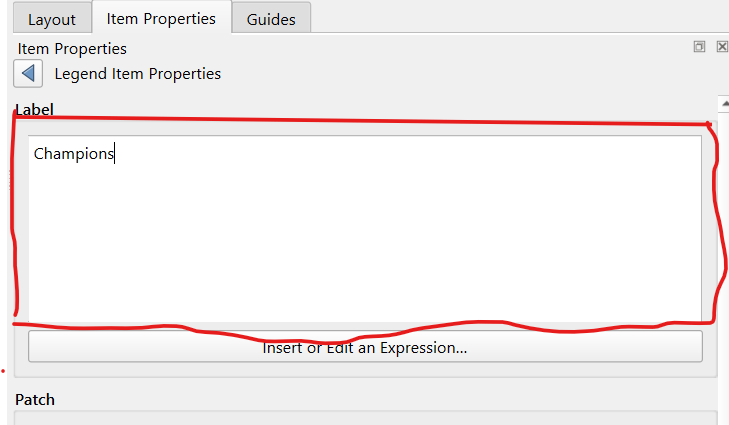
I needed to edit the map legend item labels so that the final map would not show underscores in the labels. Also, since the title had already captured the term “World Cup,” there was no need to repeat it in the legend item labels. I renamed world_cup_winners to Champions and world_cup_participants to Participants.
This was achieved by first changing the legend properties to manual configuration:
and selecting each legend item and clicking the Edit selected item properties button:
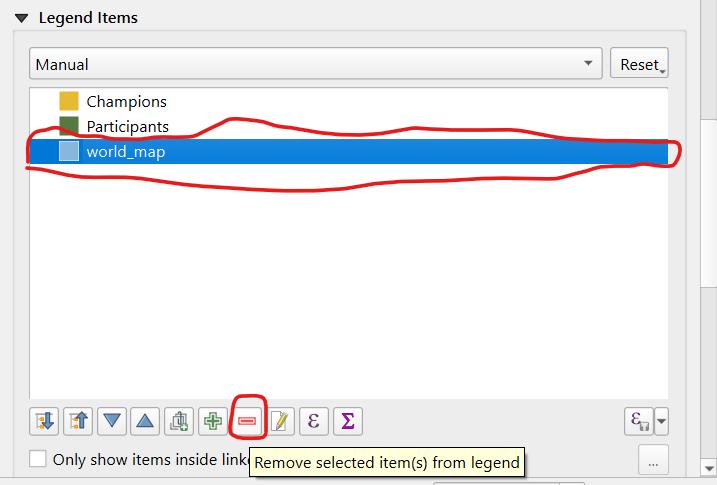
The world_map legend item was not necessary, since it only pointed to the context layer, so I removed it:
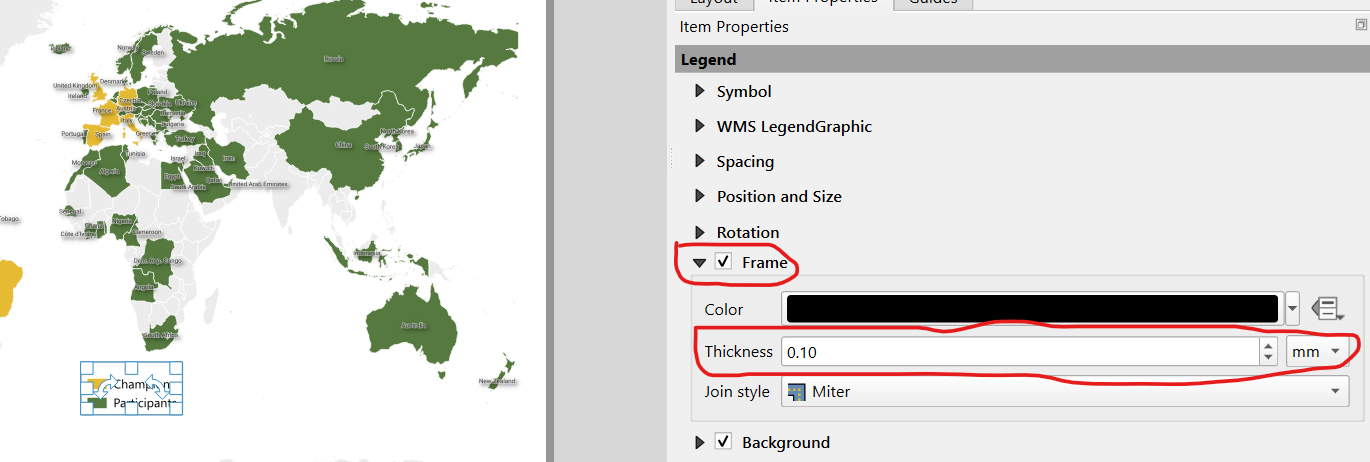
I finally added a frame of 0.1mm thickness to the legend:
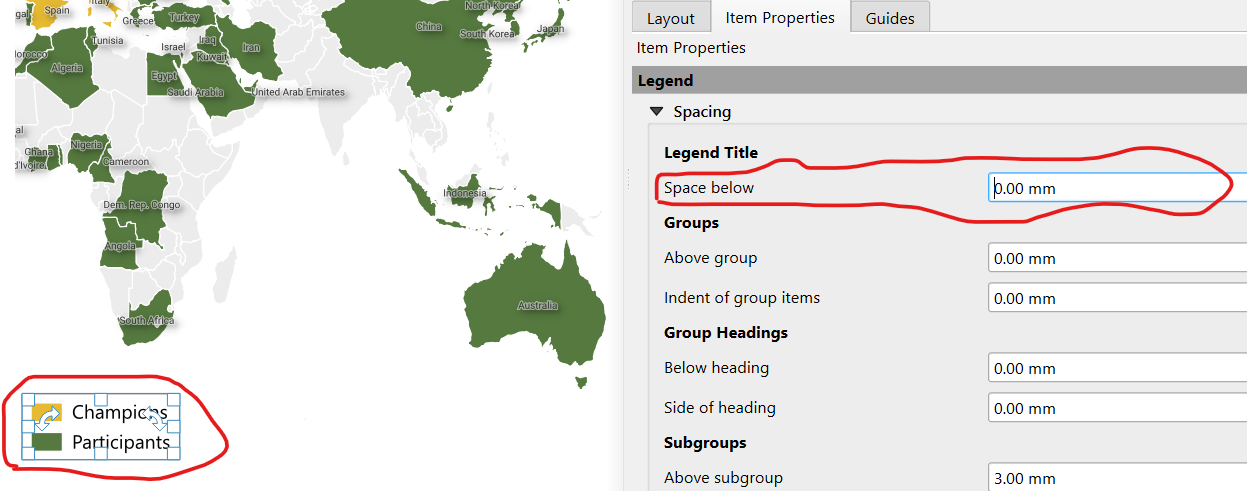
Having added the legend frame, I noticed extra space between the legend items and the frame, this is the default spacing between the legend title and the items. I removed the space below the legend title:
Adding a rectangle
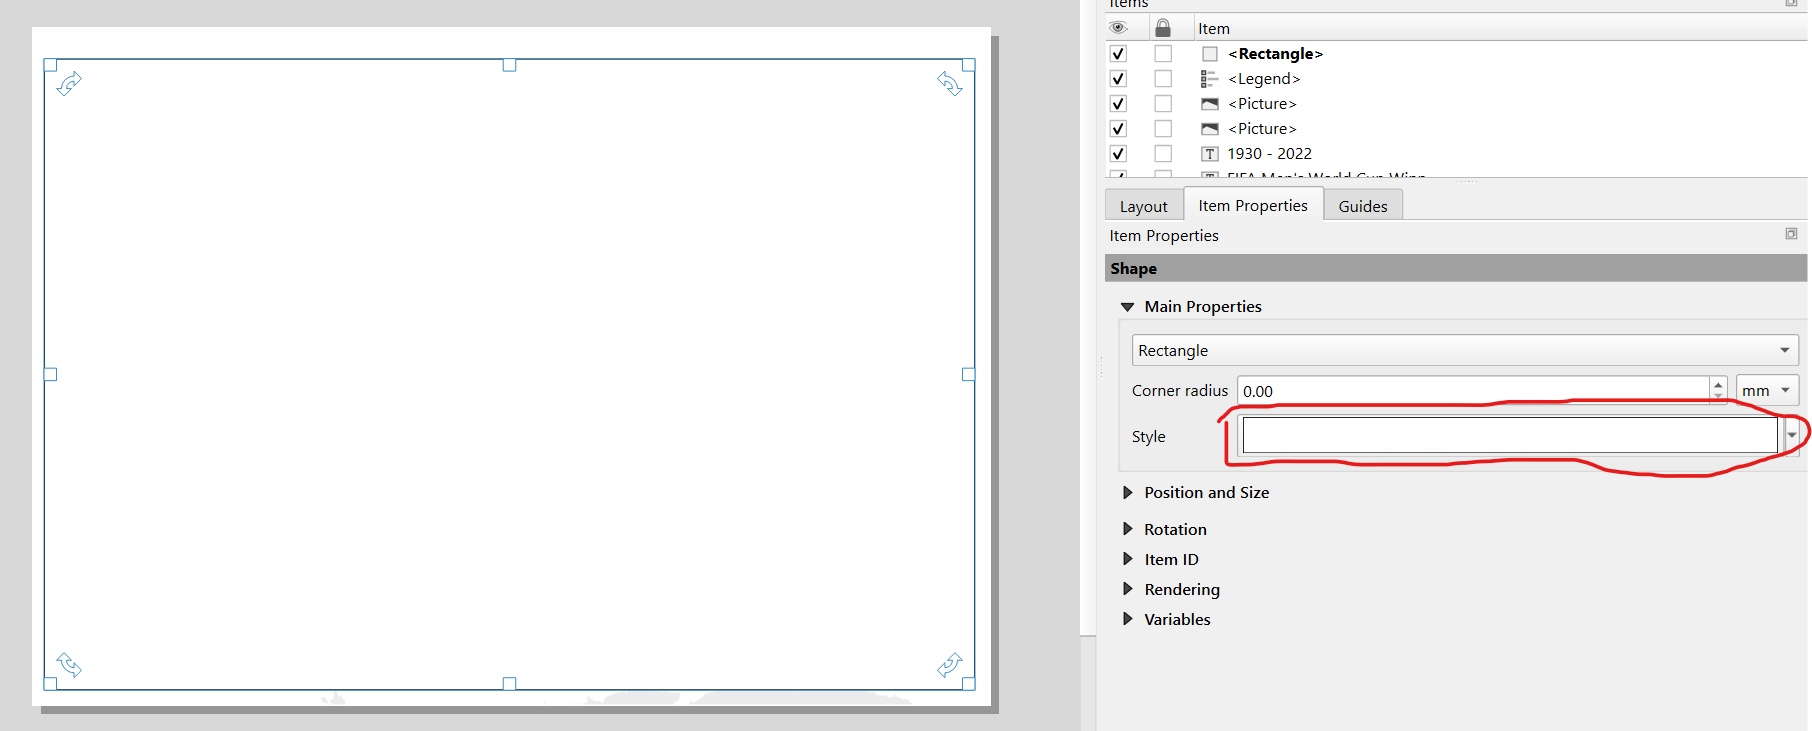
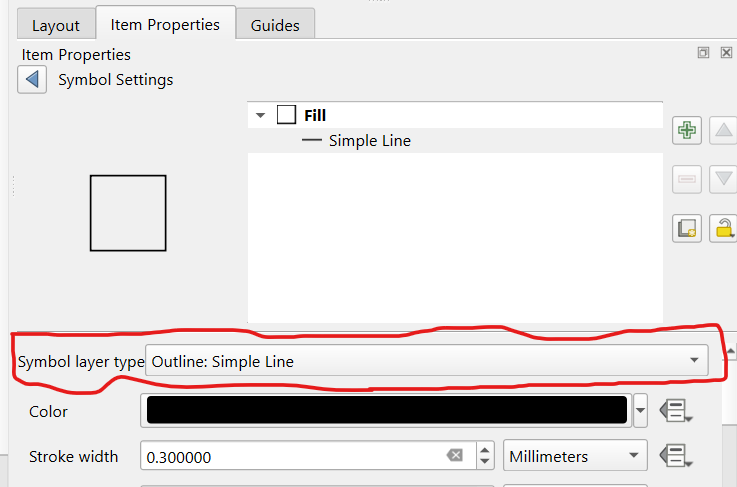
I added a rectangle to contain all the map elements:
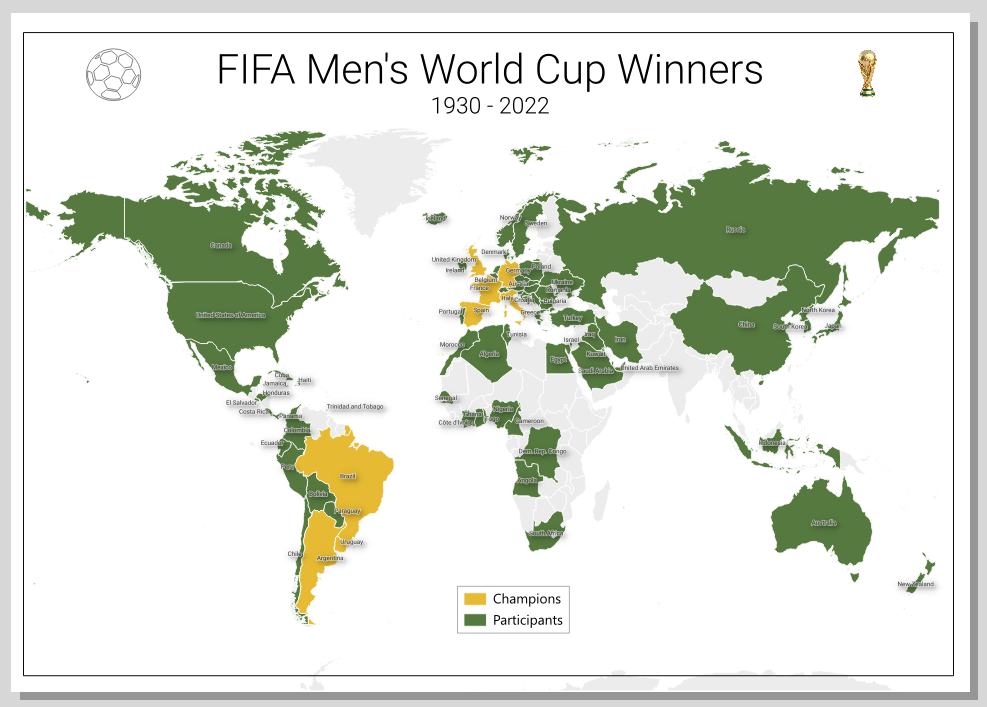
The map was almost complete. But I remembered that the sources indicated Brazil was the only country to have participated in every tournament, and that I had combined the UK constituents. I wanted this information placed on the map to give readers more context.
Adding ancillary text
I added the text Brazil is the only country to have played in every tournament. Note: UK constituents have been combined. and placed it in the lower-left corner of the map.
I also added the data source, Data Source: https://en.wikipedia.org/wiki/FIFA_World_Cup, and signed my work as the cartographer: © 2026 Dickson Mbeya.
Adding the QGIS swag
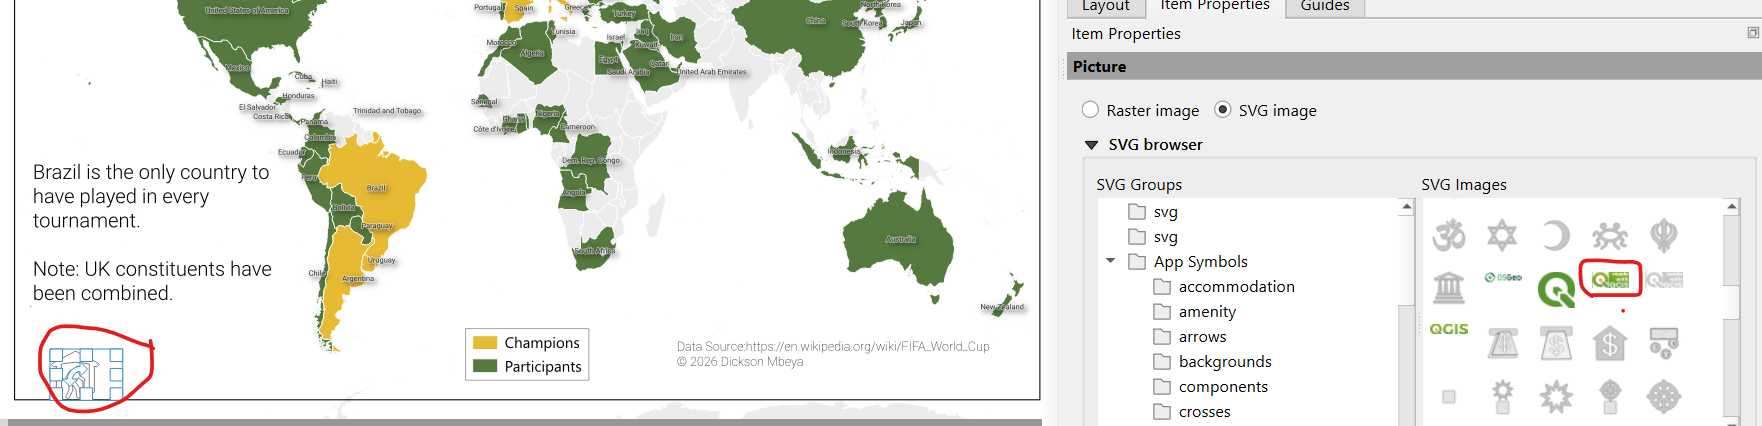
The final touch to the map was a little flex: I added the Made with QGIS logo to show off the software behind it, placing it in the lower-left corner:
Lessons learnt
A few things worth remembering for next time:
- Name matching is the real work. Country name mismatches between data sources and reference layers are near-guaranteed, build in time for this step.
- Reserved words can break queries silently. A layer named
World Mapfailed the SQL query builder simply becauseMapis SQL vocabulary. Rename layers to avoid ambiguity. - Duplicate layers keep referencing the original source. When duplicating a layer, remember the underlying file name, not the panel display name, is what your queries must reference.
- Historical and constituent nations need a documented decision. Dissolved states (USSR, Yugoslavia, Czechoslovakia, East/West Germany) and UK constituents don’t map cleanly onto modern admin-0 layers. Decide how to handle them early, and disclose the choice on the map itself.
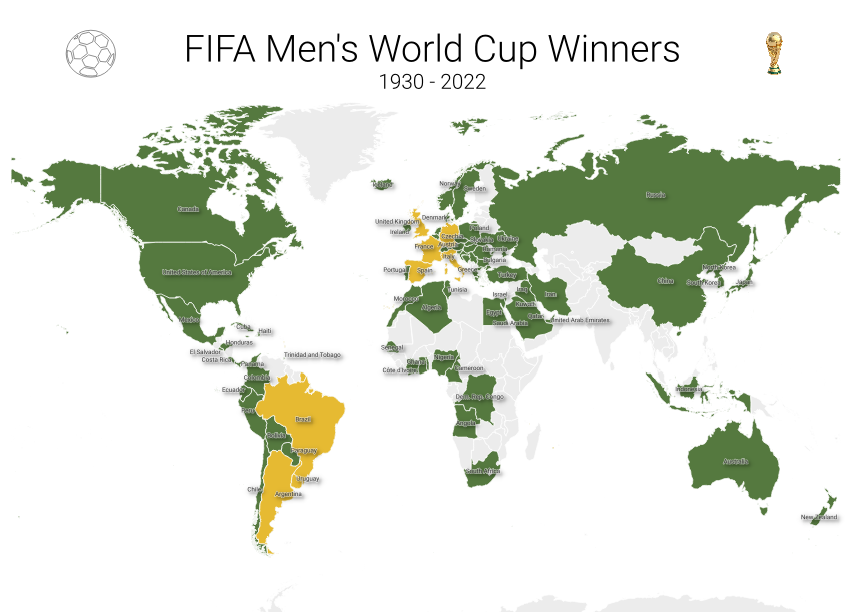
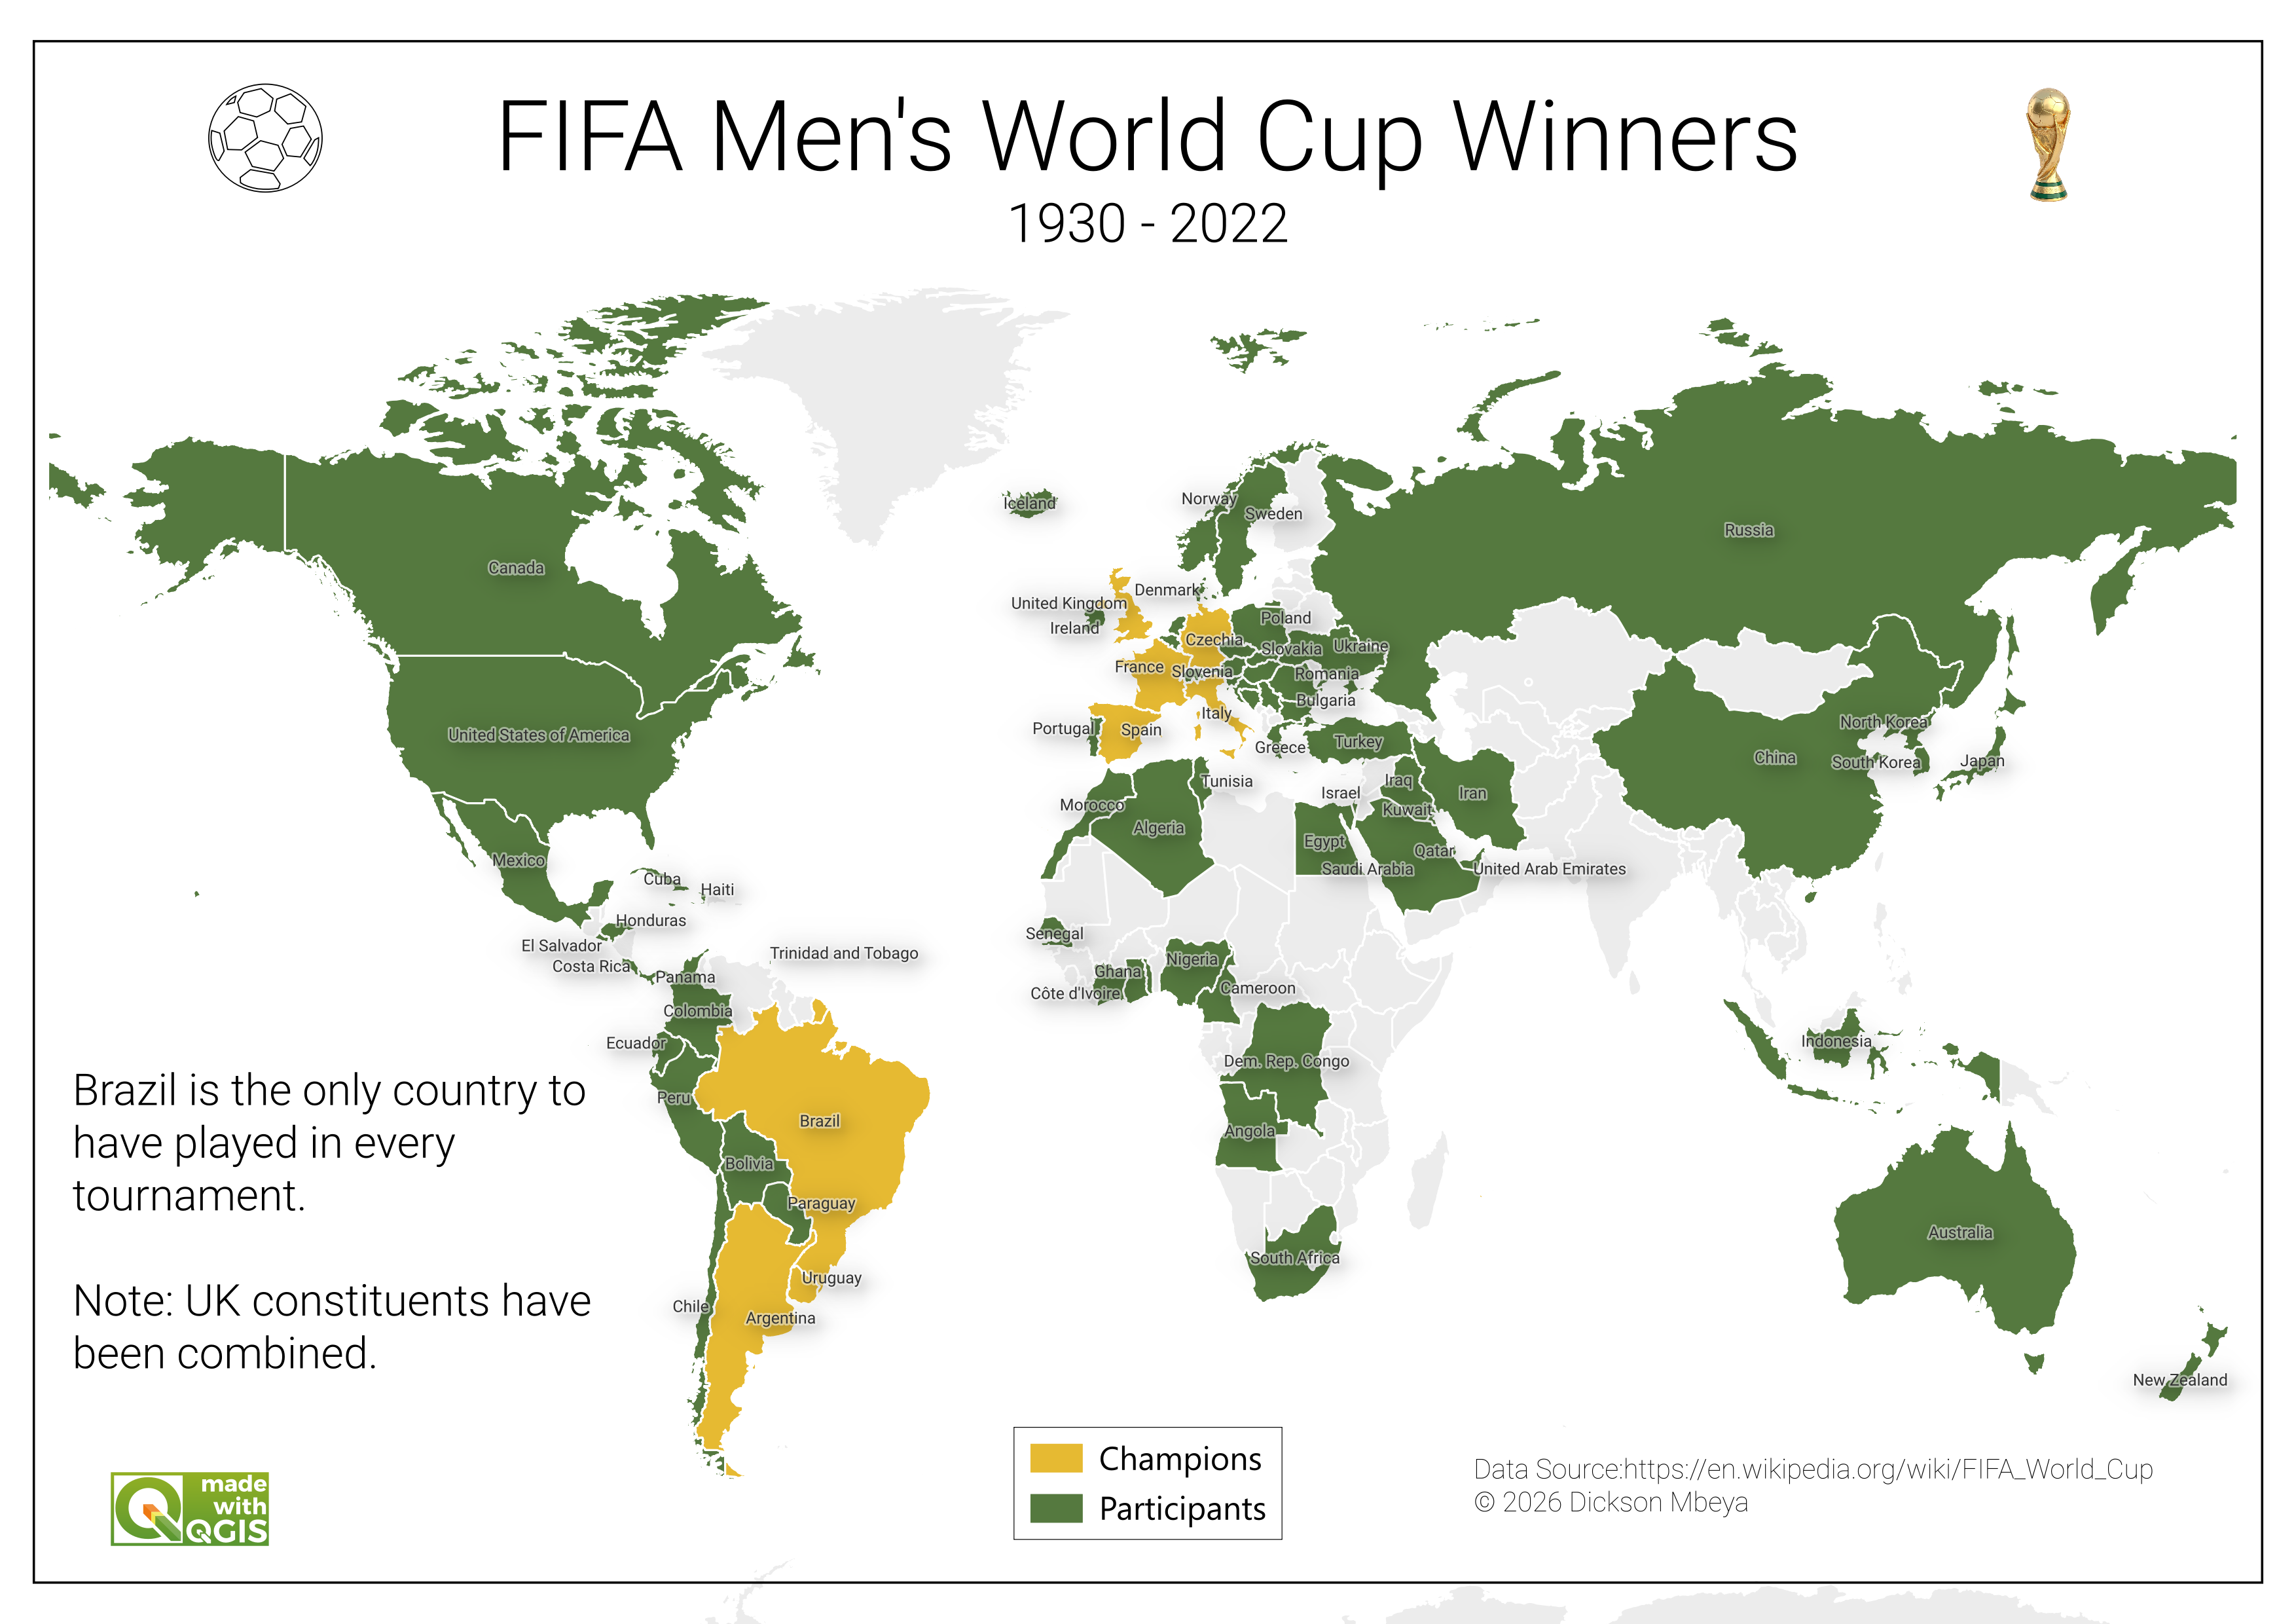
Behold, the final map!
The map was ready for exporting, as an image, PDF, and more:
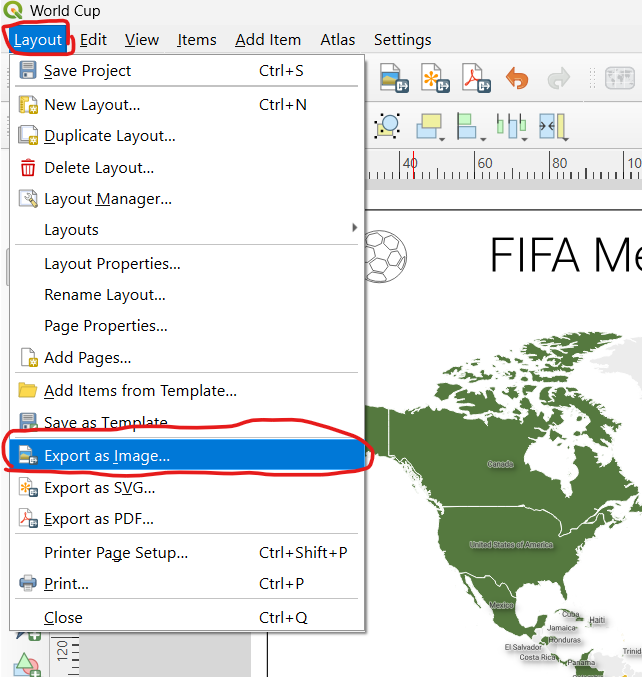
I exported the map as an image:
Happy mapping, everyone!
– Dickson